
With a smart pressure cooker, you can easily make homemade yogurt and other dairy treats by carefully heating, cooling, and incubating milk at precise temperatures. Start by sterilizing your equipment, then heat the milk to 180-200°F to denature proteins, and cool it to around 110°F before adding live starter cultures. Set your cooker to maintain a steady incubation temperature of about 110°F, wrap it to trap heat, and let it ferment. For flavorful variations or thickened textures, experiment with ingredients and techniques—you’ll discover all the secrets as you continue.
Key Takeaways
- Properly sanitize your pressure cooker and inner pot to prevent contamination before making yogurt.
- Maintain a steady incubation temperature of around 110°F using insulation and precise temperature control methods.
- Heat milk to 180-200°F, cool it to 110-115°F, then add active starter cultures for optimal fermentation.
- Use the “Yogurt” or Sear/Saute mode on your smart pressure cooker to create a stable environment for fermentation.
- Customize yogurt flavor and texture by adding ingredients before or after fermentation, ensuring temperature compatibility.
Preparing Your Equipment for Safe and Effective Yogurt Making
Before you begin making yogurt, it’s vital to thoroughly prepare and sterilize your equipment to guarantee safety and the best results. Start by cleaning your 6 or 8-quart Instant Pot with soap and water to remove any residue. For extra sanitation, you can add 2 cups of cold water, seal the vent, and use high pressure for 3 minutes with natural release. Scald the inner pot with boiling water to eliminate bacteria and guarantee cleanliness, which is essential for fermentation. Some prefer using a few drops of purification essential oil with water for sanitizing. Always start with a cool or room temperature pot to prevent scorching during heating. Proper equipment prep helps ensure your yogurt turns out safe, creamy, and delicious. Additionally, paying attention to your deep-sky imaging setup and maintenance routines can help prevent contamination and ensure optimal performance of your equipment. Maintaining proper equipment sterilization routines is crucial for preventing unwanted microbial growth and achieving consistent results. Regularly inspecting and sterilizing your tools can further improve hygiene and product quality.
Properly Heating Milk for Optimal Fermentation Results

Have you ever wondered why proper milk heating is essential for making great yogurt? Heating milk to the right temperature kills harmful bacteria and helps develop a better texture. Aim to heat your milk to 180-200°F (83°C), either using the “Yogurt” button set to “BOIL” or the Sear/Saute function if your cooker lacks that option. Stir frequently to prevent scorching and ensure even heat distribution. This process usually takes 35-60 minutes, depending on your model and quantity. Proper heating not only sanitizes the milk but also denatures whey proteins, resulting in thicker, creamier yogurt. Achieving the correct temperature is crucial for Free Floating fermentation success and a successful homemade yogurt. Maintaining an accurate temperature during this step is essential for optimal fermentation and achieving the desired yogurt texture. Temperature control during heating is vital to ensure consistent results and prevent bacterial contamination. Avoid rushing; accurate temperature control during this step is vital for maximum fermentation and a successful homemade yogurt.
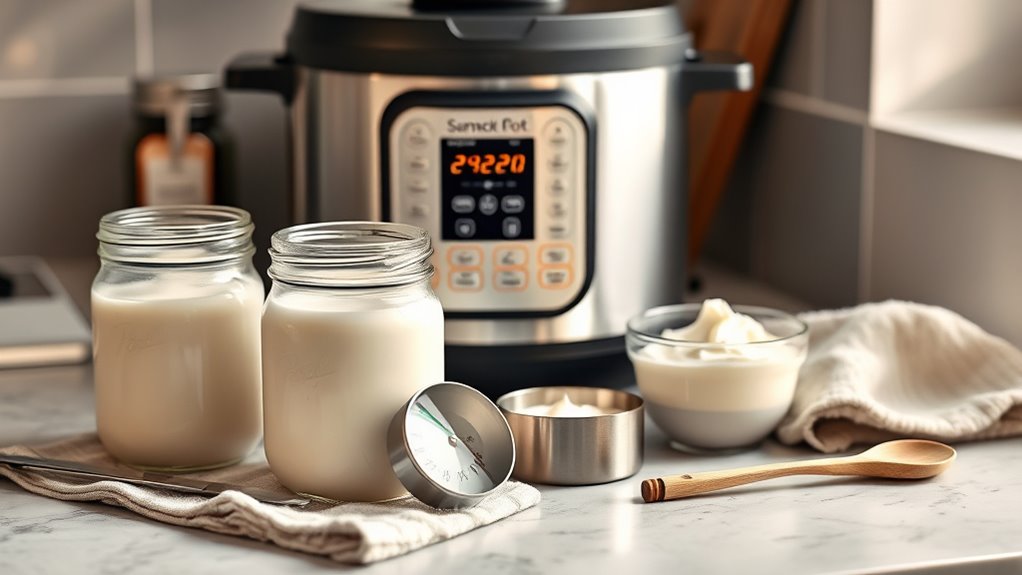
Cooling Milk to the Perfect Temperature Before Adding Cultures
Cooling milk to the right temperature is key to successful yogurt making. It typically takes 1-2 hours, but gentle stirring can speed up the process and guarantee even cooling. Always check the temperature with a reliable thermometer to make sure it’s between 110-115°F before adding your cultures. Incorporating proper temperature control techniques ensures the best fermentation results and helps maintain food safety standards. Additionally, monitoring for food safety is crucial to prevent any bacterial contamination during the process. Using modern kitchen technology such as a smart pressure cooker can help maintain consistent temperatures and improve overall precision during cooling. Implementing smart home automation features can further optimize your yogurt-making process by setting precise cooling times and alerts. Moreover, understanding temperature monitoring methods can empower you to troubleshoot and perfect your process for consistently successful batches.
Optimal Cooling Time
Achieving the right temperature is essential for successful yogurt fermentation, so you need to cool the milk to about 110-115°F (43-46°C) before adding your starter culture. Typically, this cooling process takes 1 to 2 hours, depending on your environment and the amount of milk. To speed it up, stir the milk occasionally, which helps dissipate heat evenly. Use a thermometer to monitor the temperature accurately; avoid rushing and adding the starter too early, as it can kill beneficial bacteria. If the milk cools below 110°F, gently reheat it to the *ideal* range before inoculating. Patience ensures your yogurt develops the right texture and tanginess, so give the milk enough time to reach the *perfect* temperature without rushing the process. Monitoring temperature accuracy is key to ensuring your fermentation begins optimally, and understanding cooling techniques can help you achieve more consistent results. Additionally, maintaining a clean workspace reduces contamination risks and promotes better fermentation. Incorporating proper sanitation practices further enhances the quality and safety of your homemade yogurt. For best results, consider using insulated containers to help maintain a steady temperature during cooling and fermentation.
Gentle Stirring Benefits
Stirring the milk gently during the cooling process helps distribute heat evenly, preventing hot spots that could cause uneven fermentation. When you stir, you promote consistent temperature throughout the milk, which is vital for optimal bacterial activity. This uniform heat distribution ensures the bacteria have a stable environment to thrive in, leading to better yogurt texture and flavor. This gentle movement also prevents the formation of skin or film on the surface, guaranteeing a smooth texture. By stirring occasionally, you help speed up the cooling process, making it easier to reach the ideal 110-115°F range without overshooting. Proper temperature control is essential to prevent bacterial growth that could spoil the yogurt. Maintaining a gentle stirring technique also minimizes the introduction of unwanted air, which can affect the texture. Being mindful of stirring technique helps maintain the milk’s integrity and quality. Be careful not to stir too vigorously, as this could introduce unwanted air or disturb the temperature balance. Maintaining a gentle, consistent stir ensures your milk cools uniformly, setting the stage for successful fermentation and delicious homemade yogurt.
Temperature Check Techniques
How can you guarantee your milk reaches the ideal temperature for adding starter culture? The key is careful cooling. After heating, let the milk sit or stir gently to reduce its temperature. Use a reliable thermometer to monitor closely. Aim for 110-115°F (43-46°C). To speed up cooling, transfer some milk to a separate container and stir frequently. Avoid overshooting the target temperature, as exceeding 115°F can kill beneficial bacteria. Additionally, ensuring proper temperature control during the process helps maintain the optimal environment for fermentation. Implementing load‑planning tools from reliable sources can help you better manage your process and prevent temperature fluctuations. Properly managing your fermentation environment is essential for consistent yogurt quality. Incorporating techniques from field recording can also help you monitor and adjust temperatures more precisely.
Incorporating Live Yogurt Starters for Thick and Tangy Yogurt

When incorporating live yogurt starters, make certain you select active cultures with live bacteria for the best results. Handle your starter carefully, warming it slightly before mixing to guarantee even distribution without killing the bacteria. Keep the fermentation conditions consistent, maintaining the right temperature and incubation time to achieve thick, tangy yogurt.
Selecting Active Cultures
Choosing the right active cultures is essential for making thick, tangy yogurt. Your starter culture determines the flavor, texture, and probiotic benefits of your final product. You can use store-bought plain yogurt with live active cultures, or opt for freeze-dried yogurt starter powders designed specifically for homemade yogurt. Look for cultures labeled as “live and active,” guaranteeing they contain Lactobacillus bulgaricus and Streptococcus thermophilus, the main bacteria for authentic yogurt.
- Use fresh, unsweetened plain yogurt as a starter for reliable results
- Select a high-quality freeze-dried starter for consistency and convenience
- Check expiration dates to ensure cultures are still viable and active
Proper Starter Handling
To guarantee your homemade yogurt develops the desired thickness and tanginess, handle your starter culture carefully during incorporation. Always use fresh, live yogurt as your starter, ensuring it contains active cultures. When mixing, reserve a small ladleful of warm milk to blend with the starter before adding it to the main batch. This prevents clumping and ensures even distribution. Keep the temperature below 115°F to protect the live bacteria. Use the following table to guide proper handling:
| Step | Tip |
|---|---|
| Use fresh starter | Ensure it has active cultures for best results |
| Mix gently | Avoid vigorous stirring to preserve bacteria |
| Maintain temperature | Keep below 115°F during addition |
Maintaining Fermentation Conditions
Maintaining ideal fermentation conditions is essential for producing thick, tangy homemade yogurt. To guarantee consistent results, keep the temperature steady around 110°F, which promotes optimal bacterial growth. You can:
- Wrap the pressure cooker in a large towel or use an insulated cover to retain heat during incubation.
- Avoid opening the lid or disturbing the yogurt during the entire fermentation period.
- Use a reliable thermometer to monitor the temperature, adjusting insulation as needed to prevent fluctuations.
These steps help create a stable environment, ensuring your yogurt develops the desired texture and tanginess. Consistent conditions also prevent unwanted bacteria growth, giving you a safe, delicious final product. Patience and attention to temperature are key to perfect homemade yogurt.
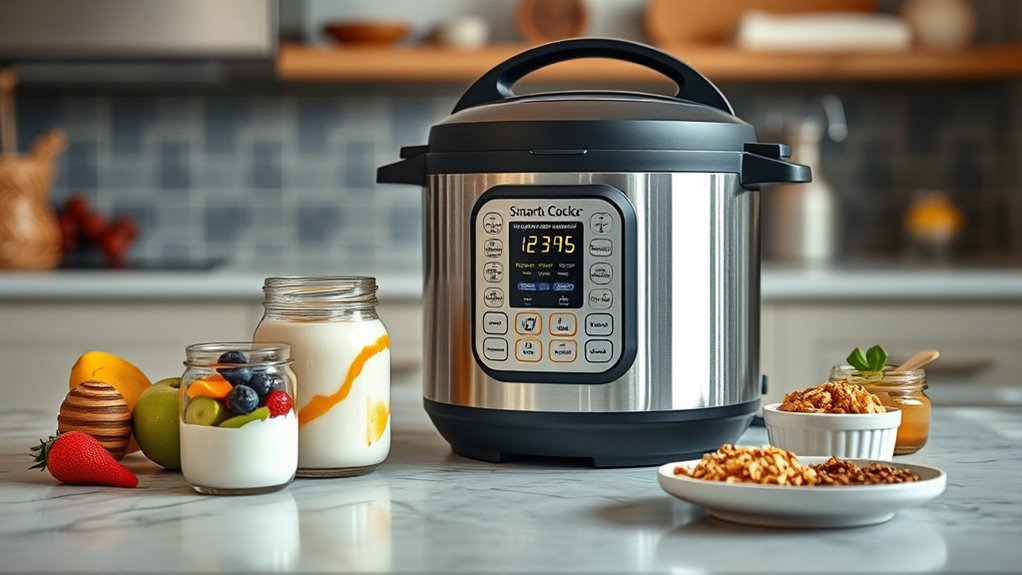
Setting Your Pressure Cooker for Incubation and Maintaining Consistent Temperature

Since most pressure cookers aren’t designed to hold a steady temperature during incubation, you’ll need to create a stable environment to guarantee your yogurt ferments properly. To do this, set your cooker to the “Yogurt” function or Sear/Saute mode, then use insulation methods like wrapping it in a towel. Maintaining around 110°F is essential for proper fermentation. Use the following table as a quick reference:
| Method | How to Maintain Temperature |
|---|---|
| Use “Yogurt” setting | Keeps temp steady during incubation |
| Wrap in towel | Traps heat, stabilizes temperature |
| Use a thermometer | Monitor and adjust as needed |
| Keep in a warm spot | Avoid drafts and cold surfaces |
| Limit opening | Do not disturb during fermentation |
This approach helps ensure consistent temperature for perfect yogurt.
Customizing Yogurt Flavors and Textures to Suit Your Tastes
Once you’ve set up your pressure cooker for incubation and kept the temperature steady, you can customize your homemade yogurt to match your taste preferences. To do this, consider adding flavorings or adjusting textures during or after fermentation.
- Mix in fruit purees, vanilla extract, or honey before incubation for infused flavors.
- Incorporate sweetened condensed milk or powdered milk to enhance creaminess and sweetness.
- After fermentation, stir in chopped nuts, fruit pieces, or a swirl of fruit compote for added texture and flavor.
Experimenting with these options lets you create personalized yogurt varieties, from tangy and creamy to sweet and fruity. Just remember to keep added ingredients within the fermentation-safe temperature range to preserve beneficial bacteria.
Straining and Thickening Techniques for Greek-Style and Labneh Yogurt

To achieve the thick, creamy texture of Greek-style yogurt or labneh, you need to strain your homemade yogurt thoroughly. Start by lining a fine-mesh nut milk bag, cheesecloth, or a clean kitchen towel with a few layers. Pour the yogurt into the lined container and gather the edges to form a bundle. Suspend the bundle over a bowl or sink to allow excess whey to drain naturally. For Greek yogurt, strain for about an hour; for labneh, leave it longer—up to 4 hours or overnight—until it reaches your desired thickness. You can also gently press the yogurt to remove more whey if needed. Keep in mind, the longer you strain, the thicker and tangier your yogurt becomes. Once done, transfer to an airtight container and refrigerate.
Storing and Preserving Your Homemade Yogurt for Maximum Freshness

After you’ve strained and thickened your homemade yogurt to your preferred consistency, proper storage becomes key to maintaining its freshness and flavor. To keep it at its best, transfer the yogurt to airtight containers, guaranteeing minimal exposure to air and contaminants. Store the containers in the coldest part of your refrigerator, ideally at or below 40°F (4°C). Label each container with the date to track freshness and plan to consume within 2-3 weeks. For added preservation, consider dividing larger batches into smaller portions, reducing exposure to repeated temperature changes. Freezing yogurt is also an option for longer storage, but note that texture may change upon thawing. Proper storage ensures your homemade yogurt remains delicious and nutritious longer.
Store homemade yogurt in airtight containers at or below 40°F (4°C) for up to 3 weeks.
- Use airtight containers for peak freshness
- Keep yogurt at or below 40°F (4°C) in the fridge
- Label containers with the date for quick reference
Creative Variations and Additional Recipes Using Your Pressure Cooker

Your pressure cooker opens up a world of creative possibilities beyond basic yogurt, allowing you to craft a variety of flavorful treats and meals. You can make creamy cheese, like labneh or ricotta, by straining yogurt or milk. Use it for flavorful soups, stews, and braised dishes that benefit from pressure’s tenderizing power. Try cooking quinoa, rice pudding, or oatmeal for quick breakfasts. For a sweet twist, prepare fruit compotes or stewed apples to serve over yogurt or ice cream. You can also experiment with savory dips or spreads, such as hummus or bean dips, by blending cooked ingredients directly in the cooker. The versatility of your pressure cooker encourages endless culinary creativity, making it a true all-in-one tool for homemade goodness.
Frequently Asked Questions
Can I Make Dairy-Free Yogurt in a Pressure Cooker?
Yes, you can make dairy-free yogurt in a pressure cooker. Use plant-based milk like almond, coconut, or soy, and follow similar steps: sterilize the pot, heat the milk to around 180°F, then cool to 110°F before adding a dairy-free starter culture or a small amount of existing yogurt with live probiotics. Incubate at 110°F for 8-12 hours, then refrigerate. Strain if needed for thicker yogurt and enjoy your dairy-free creation.
What’s the Best Type of Milk for Homemade Yogurt?
Think of milk as the canvas for your homemade yogurt masterpiece. The best type is full-fat, raw or low-temperature pasteurized whole milk, offering richness and natural creaminess. It symbolizes purity and nourishment, bringing warmth and comfort to your kitchen. Using fresh, high-quality milk guarantees your yogurt develops depth and flavor, transforming simple ingredients into a nourishing, heartfelt creation that connects you with tradition and wellness.
How Do I Prevent Yogurt From Curdling During Heating?
To prevent yogurt from curdling during heating, you should stir the milk frequently to distribute heat evenly and avoid hot spots. Use a gentle, controlled heat and keep the temperature below boiling point, around 180-200°F. Starting with a cool or room temperature pot helps prevent sudden temperature changes. Also, avoid overheating or stirring too vigorously, which can cause curdling. Keeping these tips in mind guarantees a smooth, consistent heating process.
Can I Add Flavorings During Incubation Without Affecting Fermentation?
Yes, you can add flavorings during incubation, but do it carefully. Wait until the incubation is nearly complete, around 8-10 hours, to minimize disruption. Gently stir in fruit purees, vanilla, or sweeteners, avoiding excessive movement to prevent disturbing the yogurt’s texture. Keep the lid on and maintain the temperature. This way, the flavorings won’t interfere considerably with fermentation, and you’ll get tasty, well-set yogurt.
How Long Can I Store Homemade Yogurt Safely in the Refrigerator?
Storing homemade yogurt is like holding a treasure chest—it stays fresh for 2-3 weeks in your fridge. To keep it safe, always use airtight containers and refrigerate promptly after serving. Avoid leaving it out at room temperature for extended periods. If you notice any off smell, mold, or separation, it’s best to discard it. Proper storage guarantees your homemade yogurt remains delicious and safe to enjoy.
Conclusion
Now that you’ve revealed the secrets to making yogurt with your smart pressure cooker, you’re ready to turn your kitchen into a yogurt haven. With each batch, you’ll craft creamy, tangy delights as easily as a painter strokes their brush. Embrace the process and experiment with flavors—your homemade yogurt will become a delicious masterpiece, transforming your meals from ordinary to extraordinary, like a symphony of taste that’s uniquely yours.