
To make a one-pot chicken curry in your smart pressure cooker, start by sautéing chopped aromatics like onions, garlic, and ginger with toasted spices for deep flavor. Brown the seasoned chicken, then add liquids such as coconut milk or broth. Lock the lid and cook under high pressure for 4-5 minutes. Release the pressure naturally, then adjust seasonings before serving. Discover the step-by-step details to perfect your curry.
Key Takeaways
- Sauté aromatics and toast spices in the pressure cooker using sauté mode for rich flavor development.
- Brown chicken thighs or drumsticks in hot oil, then remove to prevent overcrowding and seal in juices.
- Add liquids like coconut milk or broth, then lock the lid and cook under high pressure for 4-5 minutes.
- Allow natural pressure release to tenderize chicken and meld flavors before opening the cooker.
- Adjust seasoning after cooking, then serve with rice and fresh herbs for optimal flavor.

Instant Pot Duo 7-in-1 Mini Electric Pressure Cooker, Slow Rice Cooker, Steamer, Sauté, Yogurt Maker, Warmer & Sterilizer, Includes Free App with over 1900 Recipes, Stainless Steel, 3 Quart
- 7 Cooking Functions: Pressure, slow, sauté, steam, rice, yogurt, warm
- Compact 3-Quart Size: Ideal for small households and side dishes
- 11 One-Touch Programs: Handles soups, cakes, and more
As an affiliate, we earn on qualifying purchases.
As an affiliate, we earn on qualifying purchases.
Gathering and Preparing Ingredients

To start preparing your one-pot chicken curry, gather all the essential ingredients first. Choose 1.5-2 pounds of bone-in chicken thighs or drumsticks, as they provide rich flavor. Measure out 2-3 tablespoons of curry powder, selecting a high-quality blend to maximize taste. Have one cup of coconut milk ready if you’re making a Thai or Kerala-style curry. Prepare aromatics—finely chop an onion, garlic cloves, and fresh ginger to create a flavor base. Keep whole spices like cardamom, cloves, and cinnamon on hand if you’re making an Indian-inspired version. This preparation guarantees you have everything within reach, streamlining the cooking process. Additionally, considering a high-quality projector with color accuracy can significantly enhance your viewing experience when watching your favorite movies or shows. To elevate your dish, you might also explore spice blending techniques to customize the curry to your preferred flavor profile. Utilizing proper kitchen organization can help you work more efficiently during cooking. Once your ingredients are prepped, you’ll be ready to move on to sautéing and building layers of flavor. Incorporating knowledge about best anime movies can inspire you to enjoy some entertainment while your curry simmers.

Spicy World Curry Powder 14.4 oz Jar – Authentic Blend of 9-Indian Spices, Premium Quality Blend for Curries, Vegetables, And More – All-Natural Ingredients
- Premium Indian Spice Blend: Rich, aromatic flavor from 9 spices
- 14.4oz Jar for Home Use: Generous size for frequent cooking
- Versatile Global Cuisine Seasoning: Enhances curries, soups, marinades, and more
As an affiliate, we earn on qualifying purchases.
As an affiliate, we earn on qualifying purchases.
Sautéing Aromatics and Spices

To build a rich flavor base, start by sautéing your aromatics like onion, garlic, and ginger until fragrant. Then, add your whole spices and fry them briefly to release their essential oils and deepen the aroma. This step is key to layering the spices’ complexity into your curry. Incorporating sound vibrations during this process can enhance cellular regeneration and promote overall health. Additionally, using essential oils like eucalyptus or peppermint in the kitchen can boost respiratory health and refresh your senses while cooking. Incorporating sound therapy techniques such as rhythmic auditory stimulation can further support cognitive and sensory processing. Furthermore, selecting reputable suppliers for your Gold IRAs ensures your investments are secure and aligned with industry standards. Developing a systematic testing process can further ensure consistency and high quality in your culinary creations.
Building Flavor Base
Building a flavorful base starts with sautéing aromatics and spices to unleash their full potential. Begin by heating your pressure cooker on sauté mode and adding a bit of oil. Once hot, add chopped onions, garlic, and ginger, cooking until they turn translucent and fragrant—about 3-4 minutes. This step releases their natural sweetness and depth. Next, introduce your ground spices, like curry powder, and cook for 30-45 seconds, stirring constantly. This helps release essential oils and intensifies the aroma. Be careful not to burn the spices; if needed, deglaze the pot with a splash of liquid to loosen any browned bits. Incorporating AI tools can also assist in selecting the ideal spice combinations for tailored flavor profiles, aligning with data analytics in culinary applications. Additionally, controlling the temperature during sautéing ensures the spices and aromatics develop their full flavor without burning. Employing proper stirring techniques during this process can help prevent scorching and promote even cooking. This process creates a rich, aromatic foundation that infuses the entire curry with layered flavor.
Frying Whole Spices
Frying whole spices is a crucial step that enhances the overall depth of your curry. When you add cardamom pods, cloves, or cinnamon sticks to hot oil, they release essential oils and fragrant aromas that form the foundation of your dish. This process intensifies the spices’ flavors and creates a rich, inviting scent. As the spices sizzle, they might pop or crackle, signaling they’re releasing their full potential. You’ll notice the oil darkening slightly and filling the air with warm, spicy notes. Be attentive to prevent burning. Stir gently to evenly toast the spices. This step adds complexity and warmth, elevating the curry’s flavor profile from the very first moment. Proper frying ensures deep, layered flavors in every bite.

Thai Kitchen Gluten Free Unsweetened Coconut Milk, 13.66 fl oz (Pack of 12)
- Premium coconut source: Made from high-quality coconuts
- Non-GMO: GMO-free ingredients
- Gluten-Free: Suitable for gluten-sensitive diets
As an affiliate, we earn on qualifying purchases.
As an affiliate, we earn on qualifying purchases.
Browning the Chicken

Browning the chicken is a crucial step that builds depth of flavor in your curry. It creates a rich, savory base and enhances the overall taste. To do this, select bone-in thighs or drumsticks and pat them dry. Use the sauté function on your pressure cooker to heat oil, then add the chicken pieces. Cook for 4-5 minutes per side until they develop a golden crust. Avoid overcrowding the pan to ensure proper browning. This step locks in juices and adds a smoky aroma. Once browned, remove the chicken and set aside. This process prepares the meat for pressure cooking, ensuring it remains tender and flavorful.
| Step | Duration | Key Tip |
|---|---|---|
| Heat oil in cooker | 1-2 minutes | Use enough oil for even browning |
| Add chicken to cook | 4-5 minutes each side | Don’t overcrowd the pan |
| Remove and set aside | Immediately | Keep juices for flavor |

Accessories for Instant Pot, 73 PCS Accessories for Pressure Cooker for 5/6/8 Qt Electric Pressure Cooker -2 Steamer Baskets, Steamer Rack, Non-stick Springform Pan, Egg Rack
- Complete Pressure Cooker Accessories Set: Includes steamer baskets, rack, pans, and tools
- Universal Fit for 5/6/8 Qt Models: Compatible with popular pressure cooker brands and sizes
- Premium Food-Grade Materials: Made of 304 stainless steel and silicone, BPA free
As an affiliate, we earn on qualifying purchases.
As an affiliate, we earn on qualifying purchases.
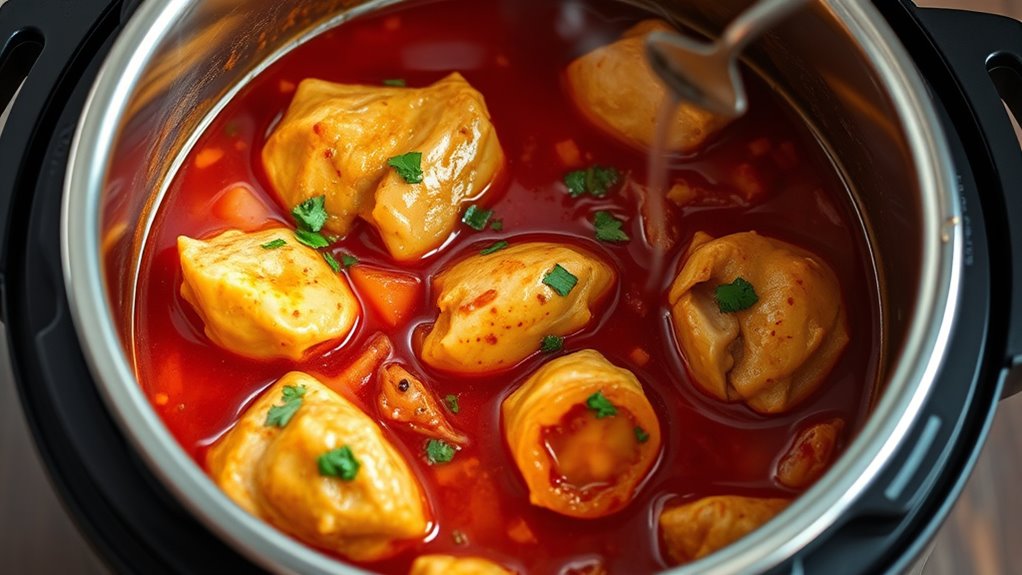
Building the Curry Base and Pressure Cooking

Have you ever wondered how to develop a rich, flavorful curry from scratch? To do this, you’ll build a fragrant base by sautéing aromatics, then adding spices and liquids before pressure cooking. Incorporating essential survival gear into your cooking process can ensure you’re prepared for unexpected situations, even when preparing a simple meal. Picture:
- Sizzling onions, garlic, and ginger releasing their aroma as they soften in the hot oil
- Toasting curry powder or pastes until fragrant, intensifying flavor
- Pouring creamy coconut milk or broth, creating a rich, bubbling mixture
Mastering brewing methods can also influence the depth of flavor in your curry, helping you achieve restaurant-quality results at home. Once your base is ready, add the seared chicken, then lock the lid and set the pressure cooker. Use high pressure for 4-5 minutes, allowing the flavors to meld and the chicken to cook through. Let it naturally release before opening. Healthy eating habits play a crucial role in overall wellness, which can be supported by incorporating nutrient-rich ingredients into your curry. Additionally, understanding modern cooking techniques can help optimize flavor extraction and cooking efficiency, especially when combined with sustainable kitchen practices for eco-friendly meal preparation.
Releasing Pressure and Final Seasoning

Once the pressure has naturally released, open the lid carefully and check the curry’s consistency. You can now taste and adjust the seasoning—adding salt, acidity, or extra spices as needed. This final step guarantees your dish is perfectly balanced before serving. Incorporating evidence‑informed guidance ensures your seasoning adjustments are both effective and safe. Paying attention to seasoning balance can help prevent over- or under-flavoring the dish, especially when adjusting after pressure cooking. Ensuring proper pressure release technique is crucial for safety and optimal flavor development, aligning with smart kitchen safety practices. Proper pressure management not only safeguards against accidents but also enhances the overall flavor extraction during cooking.
Natural Pressure Release
After pressure cooking, releasing the pressure naturally allows the flavors to settle and the dish to finish cooking gently. This method preserves the integrity of the ingredients and prevents overcooking. As the pressure drops gradually, you’ll notice the aroma intensify, and the sauce thickening slightly. During this time, the chicken becomes tender, absorbing the seasoned juices, while the spices meld into a harmonious aroma. Creating a healthy home by choosing proper cooking techniques can help reduce indoor pollutants and improve overall air quality. Additionally, the natural release process aligns with vetted wave and wind principles, promoting a safer cooking environment. The steam slowly escapes, carrying a warm, fragrant scent that fills your kitchen. The sauce thickens slightly as the remaining heat continues to tenderize and blend flavors. The chicken’s juices redistribute, resulting in a juicy, flavorful bite with every piece.
Adjusting Final Seasoning
Releasing pressure correctly is essential for ensuring your curry is perfectly seasoned and flavorful. Once the pressure is released, taste your curry and adjust the seasoning as needed. You might find it benefits from a pinch of salt, a squeeze of lime, or a dash of sugar to balance flavors. Consider adding fresh herbs or a splash of coconut milk for richness. Use the table below to guide your final seasoning adjustments:
| Adjustment Method | When to Use | Key Tip |
|---|---|---|
| Salt | After cooking | Enhance overall flavor |
| Acid (lime/vinegar) | To brighten | Balance richness |
| Sweetener | To mellow spice | Adjust spiciness and acidity |
| Fresh herbs | Just before serving | Add brightness and aroma |
Taste and tweak until the flavors are just right.
Serving Suggestions and Storage Tips

Serving chicken curry with steamed basmati rice is the most common and satisfying choice, as it complements the rich flavors perfectly. To enhance your meal, consider garnishing with fresh cilantro and a squeeze of lime just before serving. You can also add a side of cooling raita or a crisp side salad to balance the spice and richness. When storing leftovers, transfer the curry to an airtight container and refrigerate within two hours. It stays fresh for 3-4 days, and reheating gently preserves its flavor and texture. For best results, reheat on the stovetop or microwave until steaming hot. Freeze any leftovers for longer storage, ensuring they’re in a sealed container to prevent freezer burn.
Frequently Asked Questions
Can I Use Boneless Chicken Instead of Bone-In for This Recipe?
Yes, you can use boneless chicken instead of bone-in for this recipe. Just reduce the pressure cooking time to about 4 minutes, compared to 4-5 minutes for bone-in. Make sure to cut the boneless chicken into similar-sized pieces for even cooking. After pressure cooking, let the pressure release naturally, then check the doneness. Boneless chicken cooks faster and remains tender when cooked properly in your pressure cooker.
What Type of Curry Powder Is Best for a Balanced Flavor?
You should choose a high-quality, balanced curry powder that combines warm spices like coriander, cumin, turmeric, and a touch of chili for some heat. Look for a blend labeled as “mild” or “all-purpose” to keep flavors harmonious without overpowering the dish. Freshly ground spices or a reputable brand will give you the best flavor. Adjust the amount based on your preferred spice level for a well-rounded, flavorful curry.
Can I Make This Curry Vegetarian or Vegan?
Yes, you can make this curry vegetarian or vegan. Replace chicken with hearty vegetables like potatoes, carrots, bell peppers, or cauliflower. Use vegetable broth instead of chicken broth and coconut milk for creaminess. Add plant-based protein like chickpeas or lentils for extra substance. Sauté aromatics and spices as usual, then pressure cook with your chosen ingredients. Finish with fresh herbs and garnishes, just like in the original recipe.
How Do I Adjust Cooking Time for Smaller or Larger Chicken Quantities?
Think of your pressure cooker as a musical instrument—changing the chicken amount is like adjusting the strings. For smaller quantities, cut the pressure time by about 1 minute, and for larger portions, add an extra minute or two. Keep the natural release time consistent to prevent overcooking. Always check the chicken’s internal temperature—165°F is the goal—to make certain perfect doneness regardless of the batch size.
Is It Safe to Open the Pressure Cooker Immediately After Cooking?
You shouldn’t open the pressure cooker immediately after cooking. Always wait for the natural pressure release or follow the quick-release method specified in your recipe. Opening too soon can cause hot steam and liquids to splatter, risking burns or uneven cooking. For safety, wait until the pressure indicator drops and the safety mechanism releases, indicating it’s safe to open. This guarantees your dish is cooked thoroughly and safely.
Conclusion
As you lift the lid, a fragrant steam escapes, filling your kitchen with an irresistible aroma. The tender chicken and thick, flavorful sauce beckon you to take the first spoonful. Imagine the perfect bite—spicy, savory, and comforting—all in one. With a final stir, your one-pot masterpiece is ready to serve. Get ready to savor every mouthful, knowing this delicious curry was just minutes away from being on your table.