
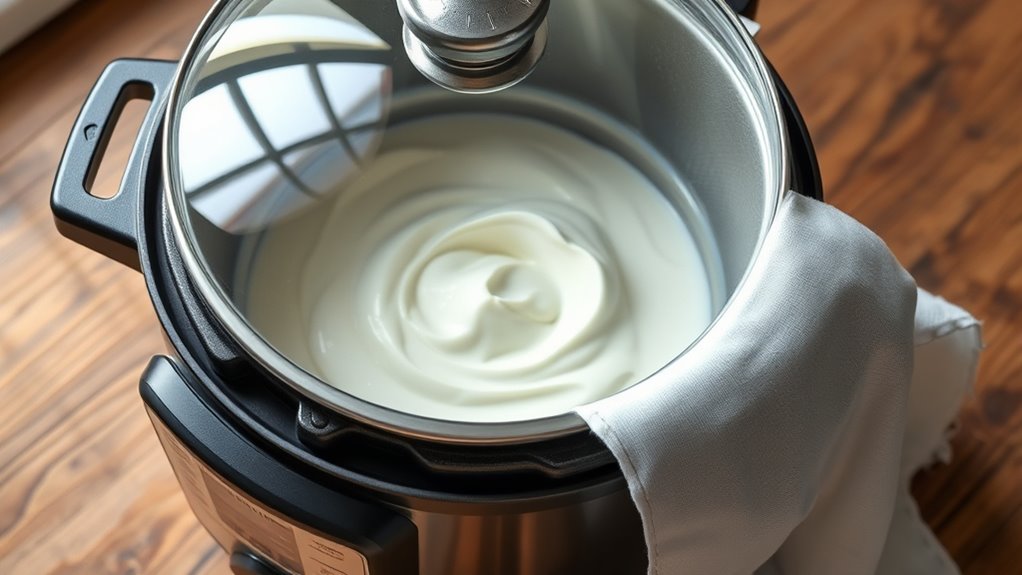
To make homemade yogurt in a smart pressure cooker, start by thoroughly cleaning and sterilizing the inner pot. Heat fresh milk to 180-200°F, then cool it to around 110-115°F before mixing in a live-culture starter. Pour the mixture into the cooker, set it to incubate for 8-12 hours, and keep the environment stable. Once thickened and tangy, refrigerate. Continue exploring this process to perfect your homemade yogurt.
Key Takeaways
- Thoroughly clean and sterilize the inner pot before adding fresh, high-quality milk, avoiding ultra-pasteurized types.
- Heat the milk to 180-200°F using the “Yogurt” or “Boil” setting, then cool to 110-115°F for optimal bacterial growth.
- Whisk and temper plain yogurt with live cultures into warm milk, then mix thoroughly before incubation.
- Incubate the mixture in the sealed pressure cooker for 8-12 hours without opening the lid to ensure proper fermentation.
- After incubation, check for thickness and tanginess, then refrigerate or strain for desired consistency.

Instant Pot Duo 7-in-1 Mini Electric Pressure Cooker, Slow Rice Cooker, Steamer, Sauté, Yogurt Maker, Warmer & Sterilizer, Includes Free App with over 1900 Recipes, Stainless Steel, 3 Quart
7 Cooking Functions: Pressure cook, slow cook, sauté, steam, make rice, yogurt, or simply keep your meal warm—all…
As an affiliate, we earn on qualifying purchases.
As an affiliate, we earn on qualifying purchases.
Equipment Preparation and Sanitization
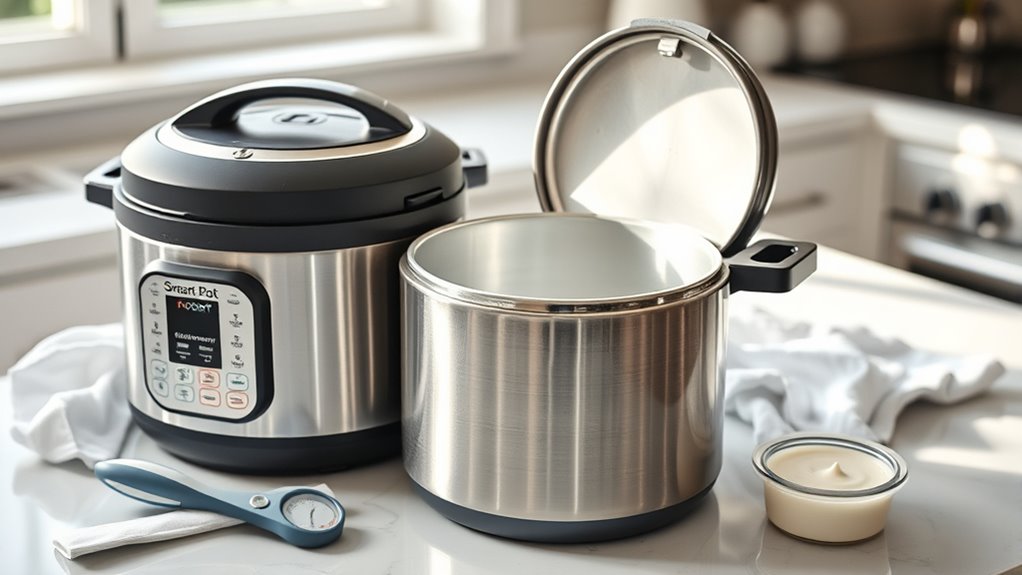
Before making homemade yogurt, you need to thoroughly prepare and sanitize your equipment. Start by cleaning the Instant Pot’s inner pot with soap and water to remove any residue or grease. After washing, sterilize the pot by adding 2 cups of water, sealing the vent, and setting it to high pressure for 3 minutes. This process kills bacteria and ensures a clean environment for your yogurt. For extra cleanliness, scald the inner pot with boiling water, then dry it completely with a clean towel. Check that the rubber sealing ring is properly positioned in the lid to prevent leaks during heating and incubation. Proper sanitation and equipment prep are essential for safe, successful yogurt-making, ensuring your final product is fresh and free from unwanted bacteria. Incorporating Free Floating techniques can help maintain a clean workspace and prevent contamination throughout the process. Additionally, understanding quality assurance principles can help you maintain consistent results and ensure the safety of your homemade yogurt. Maintaining a hygienic environment during all steps is crucial to prevent spoilage and ensure optimal fermentation results.

Supa Ant Pressure Canner 23 Qt with Canning Supplies Starter Kit – Canning Pressure Cooker with Gauge – Water Bath Canner Pot with Rack and Lid – Jar Lifter, XL Ladle, Jar Tongs, and Bubble Popper
High Capacity Canning Pot: Large 23-quart capacity pressure canner allows you to can in large batches, perfect addition…
As an affiliate, we earn on qualifying purchases.
As an affiliate, we earn on qualifying purchases.
Selecting and Heating the Milk
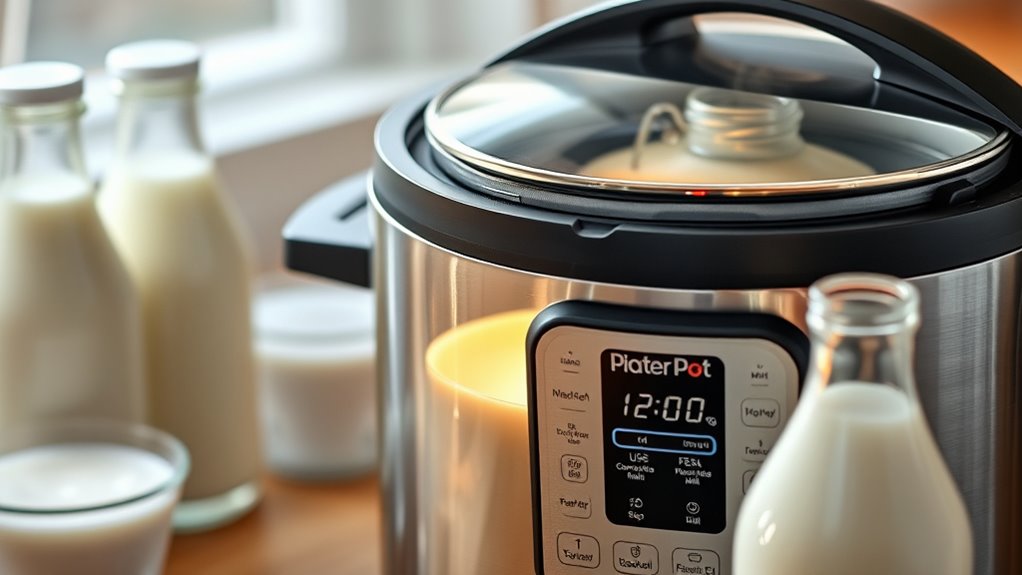
Start by choosing fresh, high-quality milk, preferably not ultra-pasteurized, to guarantee the best yogurt texture and flavor. When heating the milk, use gentle, even techniques to bring it to 180-200°F, whisking regularly to prevent scorching. Always monitor the temperature closely to make sure the milk reaches a safe level for fermentation. Incorporating proper disposal habits for any leftover milk can help prevent plumbing issues and maintain a clean kitchen environment. Implementing sustainable waste management practices supports eco-friendly kitchen routines. Additionally, being mindful of local recycling guidelines can further reduce waste and promote environmental responsibility. Maintaining consistent temperature control during heating ensures optimal conditions for yogurt fermentation and quality. Ensuring proper food safety practices during the process can help prevent contamination and ensure a successful batch.
Choosing the Right Milk
Choosing the right milk is vital for making creamy, flavorful homemade yogurt. Opt for whole milk or 2% for the best texture and richness. Avoid ultra-pasteurized milk, as it can hinder bacterial fermentation and result in thinner yogurt. Fresh, high-quality milk yields better flavor and consistency. You can use cow’s milk from your local store or farm, but always check the label to guarantee it’s free from additives or stabilizers. Before heating, pour the milk into the cleaned inner pot, making sure not to exceed the maximum fill line. Heating the milk evenly to 180-200°F is essential to eliminate harmful bacteria and modify proteins, setting the foundation for a smooth, velvety yogurt. Incorporating essential oils for dairy preservation can help maintain freshness and prevent spoilage during fermentation. Additionally, understanding pasteurization processes can help you select the best milk for homemade yogurt.
Proper Heating Techniques
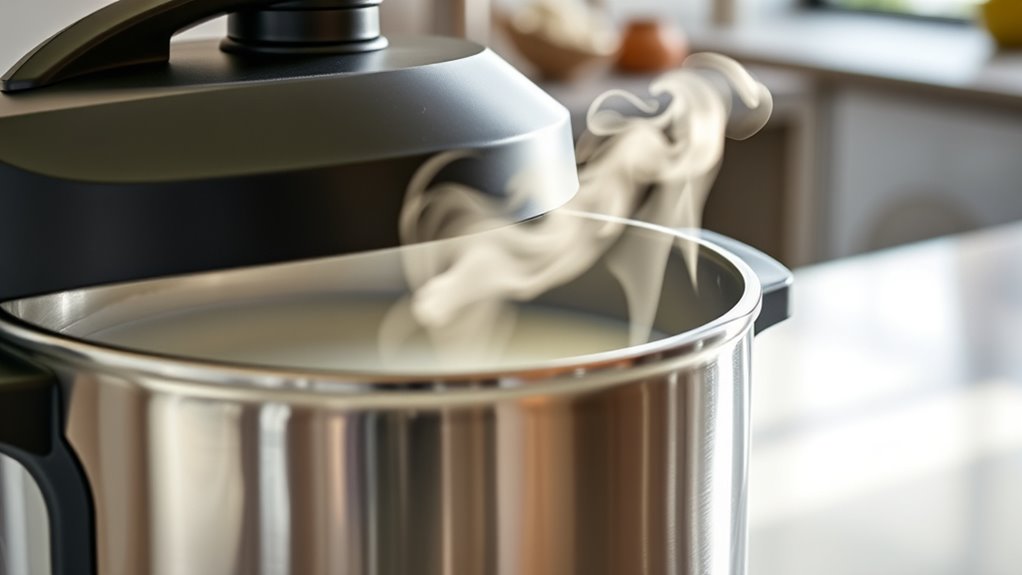
Selecting the right milk and heating it properly are key steps in making creamy, flavorful homemade yogurt. Use fresh, preferably not ultra-pasteurized milk, as it cultures better. Pour the milk into your Instant Pot, stopping before the maximum fill line. To heat, press the “Yogurt” button, then adjust until the display reads “Boil.” This activates the heating process. Heat the milk to between 180-200°F (83-93°C), which kills unwanted bacteria and denatures proteins for better texture. Whisk the milk every 5 minutes during heating to guarantee even temperature distribution. Proper heating creates an ideal environment for the beneficial bacteria to thrive later during incubation. Always monitor the temperature carefully with a clean thermometer to avoid overheating, which can affect the final yogurt’s quality.
Ensuring Milk Safety
Using high-quality, preferably non-ultra-pasteurized milk is essential for making safe and delicious homemade yogurt. Choose fresh milk from a trusted source, as ultra-pasteurized milk may not gel properly and can affect texture. Before heating, pour the milk into the cleaned and sanitized inner pot, ensuring you don’t exceed the maximum fill line. When heating, set your Instant Pot to the “Yogurt” function and adjust to “Boil,” bringing the milk to 180-200°F (83-93°C). This step kills harmful bacteria and denatures proteins, creating a stable environment for fermentation. Whisk the milk every 5 minutes to promote even heating. Proper selection and heating guarantee your yogurt is safe to consume, with ideal texture and flavor.

Coolinario L Reuteri Yogurt Starter (10-Pack, 1.5g Sachets) Yogurt Starter Culture with Lactobacillus Reuteri Probiotics | Creamy & Delicious | Non-GMO, No Preservatives, Gluten Free
Effortless to Make at Home: Making yogurt at home is simple and rewarding. Heat 2 liters of your…
As an affiliate, we earn on qualifying purchases.
As an affiliate, we earn on qualifying purchases.
Cooling the Milk to Ideal Temperature
Cooling the milk to the ideal temperature is a crucial step to guarantee successful yogurt fermentation. Once the heating cycle ends, remove the inner pot from the pressure cooker to prevent further temperature rise. To cool the milk quickly, submerge the pot in a cold water bath, gently stirring to distribute the coolness evenly. Use a clean thermometer to monitor the temperature, aiming for 110-115°F (43-46°C). If you prefer, you can let the milk cool naturally at room temperature, but this may take 1-2 hours. Be cautious not to let the temperature drop below the target range, as this can hinder bacterial growth. Ensuring the milk reaches the correct temperature creates an ideal environment for the starter culture to ferment effectively.

Yacumama Digital Water Thermometer for Liquid, Candle, Instant Read with Waterproof for Food, Meat, Milk, Long Probe
WATERPROOF – IPX7 waterproof. No worry on the rinse or wash under running water after measuring, easy clean…
As an affiliate, we earn on qualifying purchases.
As an affiliate, we earn on qualifying purchases.
Incorporating the Starter Culture
To incorporate the starter culture effectively, begin by removing 1 cup of the warm milk from the Instant Pot and whisking it together with 2 tablespoons of plain yogurt containing live cultures in a separate bowl. This step tempers the yogurt, preventing clumping when added to the larger batch. Once mixed, slowly pour this tempered mixture back into the main pot of warm milk, whisking continuously to ensure even distribution. It’s important to incorporate the starter thoroughly to promote consistent fermentation throughout the batch. Even distribution of the cultures is essential for uniform fermentation and tangy flavor development. Proper mixing techniques can further help improve culture viability and ensure the bacteria remain active throughout the process. After blending, give the milk a final stir and then transfer it for incubation. This process guarantees that the beneficial bacteria are evenly spread, setting the stage for a smooth, tangy homemade yogurt. Integrating energy-efficient technology into your kitchen appliances can further enhance sustainable practices in food preparation.
Incubating the Yogurt in the Instant Pot

Once you’ve added the starter culture, place the inner pot back in the Instant Pot and set the incubation time to your desired length. Make sure the lid is sealed and the vent remains in the sealing position to keep the temperature steady. Throughout incubation, avoid opening or disturbing the yogurt to guarantee consistent fermentation. For optimal results, regularly check that the temperature remains stable during the process. Maintaining a consistent incubation environment is essential for achieving the desired texture and flavor. To ensure reliable results, consider using smart‑home integrations to monitor and control the temperature remotely. Additionally, choosing a supportive appliance that maintains even heat distribution can help improve the overall quality of your homemade yogurt. Regularly verifying the temperature consistency can further enhance the fermentation process and the final product quality.
Setting Incubation Time
Setting the incubation time correctly is crucial for achieving the desired flavor and texture in your homemade yogurt. You’ll want to select an incubation period that balances tanginess and thickness. Typically, 8 to 12 hours works well. Longer fermenting times develop a tangier flavor and thicker consistency, while shorter times produce milder yogurt. To set the time, press the “Yogurt” button on your Instant Pot, then adjust the timer using the “Adjust” button until you reach your preferred duration. Confirm the lid’s vent remains sealed in the sealing position to maintain a consistent environment. During incubation, resist the urge to open or disturb the yogurt to allow proper bacterial fermentation. Monitoring the time ensures your yogurt develops just the right flavor and texture.
Maintaining Temperature Stability
How can you guarantee your yogurt incubates at a consistent temperature? The key is to trust your Instant Pot’s ability to maintain stable heat once you set it. After adding your starter, press the “Yogurt” button and adjust the time accordingly. Keep the lid sealed with the vent in the sealing position; this traps heat and prevents temperature fluctuations. Avoid opening the lid during incubation, as this can cause temperature drops and disrupt fermentation. You might consider using a thermometer to double-check the internal temperature periodically, but generally, the Instant Pot’s design ensures steady heat. Rest assured, the appliance’s precise temperature control creates an ideal environment for the bacteria to ferment, resulting in creamy, tangy yogurt every time. Temperature stability is crucial for successful fermentation, so trusting your device’s consistent performance is essential. Additionally, some models feature temperature sensors that help maintain optimal conditions throughout the process. Ensuring the consistent environment is key to achieving the perfect texture and flavor in homemade yogurt. Proper heat distribution within the Instant Pot further supports uniform fermentation, making your yogurt consistently delicious.
Minimizing Disturbance During Fermentation
To guarantee your yogurt ferments properly, it’s important to avoid opening the Instant Pot during incubation. Every time you open the lid, you risk disrupting the stable temperature and introducing contaminants, which can affect the fermentation process and final texture. Keep the lid sealed with the vent in the sealing position to maintain a consistent environment. Resist the temptation to check on your yogurt prematurely; it’s best to leave it undisturbed for 8 to 12 hours. If you need to monitor the temperature, do so with a thermometer through the vent or lid, not by opening it. Staying hands-off during this period ensures the bacteria ferment evenly, leading to smooth, tangy yogurt with the right consistency. Patience is key to achieving perfect homemade yogurt.
Checking for Readiness and Finalizing

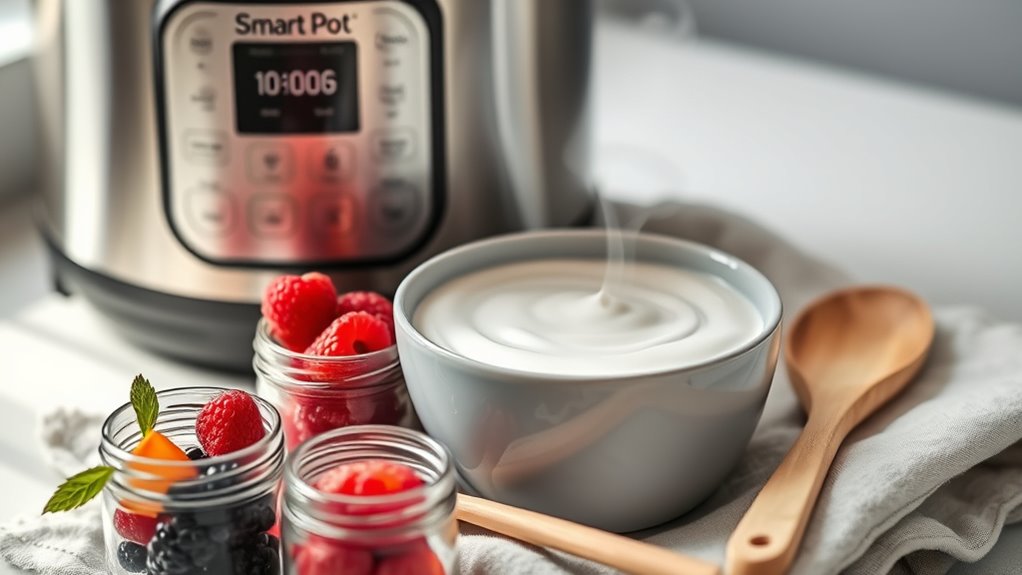
Once the incubation time is up, you should check if your yogurt has reached the desired thickness and tanginess. Carefully remove the lid, avoiding any condensation drips. Gently tilt the container to observe the consistency; it should be thickened and slightly jiggly. Use a clean spoon to taste a small amount—if it’s tangy and set, it’s ready. If you prefer a thicker or tangier yogurt, you can extend incubation by an hour or two, keeping the lid sealed and the cooker undisturbed. Avoid disturbing the yogurt during this process, as it can affect the final texture. Once satisfied, you can proceed to strain or refrigerate. Proper inspection ensures your homemade yogurt is perfectly fermented and ready for storage or serving.
Straining and Achieving Desired Consistency
After your yogurt has finished fermenting and you’ve confirmed it’s reached the desired tanginess and thickness, the next step is straining to achieve your preferred consistency. Place a nut milk bag or cheesecloth over a large bowl, and pour the yogurt into it. Allow it to strain for at least an hour for a thinner, regular yogurt. For a thicker, Greek-style texture, let it strain for 2 to 4 hours or overnight. During this process, excess whey drains away, leaving behind a creamier, denser yogurt. Straining techniques can significantly influence the final consistency of your homemade yogurt. To ensure optimal results, consider suitable pairing options for your straining setup to prevent leaks or spills. Using the appropriate straining equipment can make the process more efficient and less messy. Proper cleaning and maintenance of your straining tools will help maintain their effectiveness and hygiene. Additionally, choosing the right yogurt container can help with easy storage and organization. If you want a less tangy flavor, you can gently stir the strained yogurt before serving. Transfer the finished product to airtight containers and refrigerate if not consuming immediately. Adjust the straining time to suit your texture preference.
Storing and Saving Yogurt for Future Batches
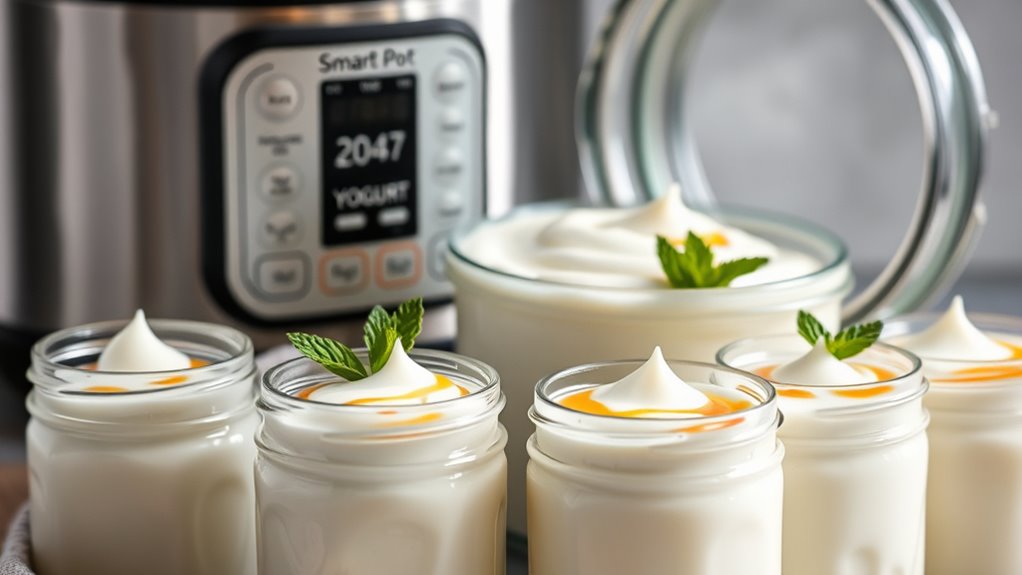
Storing and saving yogurt for future batches guarantees you always have a starter ready to go. Once your yogurt has set and cooled, transfer 2-4 tablespoons into a clean container with a tight lid. Keep it refrigerated and consume within a week for best flavor and freshness. Always use clean utensils when handling your saved yogurt to prevent contamination. To ensure reliable fermentation, save yogurt from a batch that has a good tang and texture. You can also freeze some starter in ice cube trays for longer storage, but fresh yogurt works best. When you’re ready to make another batch, simply whisk the saved yogurt into your warm milk and proceed as usual. This practice keeps your homemade yogurt consistent and cost-effective.
Frequently Asked Questions
Can I Use Non-Dairy Milk to Make Yogurt in the Instant Pot?
Yes, you can use non-dairy milk to make yogurt in your Instant Pot. Just make certain the milk is unsweetened and free of additives, as these can affect fermentation. Heat the non-dairy milk to 180-200°F, then cool it to 110-115°F before adding your preferred plant-based yogurt starter. Incubate as usual, keeping the lid sealed, and strain or refrigerate once the fermentation process is complete.
How Do I Prevent Yogurt From Developing Mold or Off-Flavors?
To prevent yogurt from developing mold or off-flavors, make certain your equipment is thoroughly cleaned and sanitized before starting. Use fresh, high-quality milk, and keep everything sterile during preparation. Maintain a consistent incubation temperature, and avoid opening the lid during fermentation. Store finished yogurt in airtight containers in the fridge, and consume it within a week. Proper hygiene and storage are key to keeping your yogurt fresh and safe.
Is It Necessary to Boil the Milk if Using Pasteurized Store-Bought Milk?
Think of your milk as a castle needing a final guard to ensure no unwanted invaders slip in. If you’re using pasteurized store-bought milk, boiling isn’t strictly necessary because it’s already been through a process to eliminate harmful bacteria. However, boiling can still provide extra assurance, especially if you want to double-check cleanliness. So, it’s optional but can help uphold the purity of your yogurt.
Can I Adjust Incubation Time for Thicker or Tangier Yogurt?
Yes, you can adjust the incubation time to make your yogurt thicker or tangier. For thicker yogurt, extend the incubation period to 10-12 hours, which allows more fermentation and a creamier texture. For tangier yogurt, also increase the incubation time, up to 12 hours, to develop a stronger flavor. Keep in mind, longer incubation may slightly change the consistency, so monitor your desired taste and texture.
How Do I Troubleshoot if the Yogurt Doesn’T Set Properly?
If your yogurt doesn’t set properly, first check the incubation temperature—ensure it stayed steady at 110-115°F. If it’s too warm or cold, it won’t ferment correctly. Also, confirm you used fresh, live-culture yogurt as a starter. If the yogurt is too runny, extend the incubation time or add more starter next batch. finally, avoid opening the lid during incubation, as it disrupts the process.
Conclusion
Making yogurt at home is like planting a seed that grows into a delicious habit. With just a few simple steps and your smart pressure cooker, you can enjoy creamy, homemade yogurt anytime. It’s a rewarding process that turns basic ingredients into a nourishing masterpiece. So, get creative, experiment with flavors, and savor the satisfaction of homemade goodness—your taste buds will thank you for this little culinary adventure.