
If you’re interested in open source kitchen tech, you can build and customize smart appliances like coffee makers, pantry trackers, or sous vide controllers using accessible hardware such as Arduino or Raspberry Pi. These projects often involve integrating sensors, automating functions, and creating user-friendly interfaces. By exploring DIY plans and open-source software, you’ll find ways to enhance your kitchen’s efficiency and automation. Keep exploring—more tips and ideas await you as you continue to unleash the potential of DIY smart appliances.
Key Takeaways
- Explore open-source hardware components like microcontrollers and sensors to build customizable smart kitchen appliances.
- Implement automation protocols and sensor integration for efficient, safe, and connected cooking experiences.
- Develop DIY projects such as smart coffee makers, spice dispensers, and inventory systems using accessible tools and software.
- Use data visualization and user interfaces to monitor appliance performance and optimize kitchen automation workflows.
- Incorporate security best practices and community resources to ensure safe, reliable, and collaborative open-source kitchen tech projects.
Getting Started With Open-Source Kitchen Technology

If you’re new to open-source kitchen technology, the best way to start is by understanding the basics of what open source means and how it can benefit your cooking and DIY projects. Open source allows you to access, modify, and share code freely, making it perfect for customizing kitchen devices. You can experiment with smart recipe sharing, where your devices communicate seamlessly to coordinate ingredients and cooking steps. Additionally, focusing on kitchen automation security guarantees your smart appliances stay protected from vulnerabilities. Starting small, like tinkering with a basic platform or community projects, helps you learn the essentials without feeling overwhelmed. As you gain confidence, you can expand your setup, integrating more open-source tools to create a smarter, more secure kitchen tailored to your needs. Exploring free floating concepts can also inspire innovative ideas for optimizing space and functionality in your kitchen environment. Incorporating local automation techniques ensures your devices work reliably within your home network, enhancing privacy and control. Understanding the importance of contrast ratio in related projection technologies can help you design better visual displays for your kitchen or entertainment area. Conducting proper load calculations can also ensure your DIY appliances are properly powered and safe to operate within your existing electrical system, especially when integrating energy-efficient solutions from European cloud servers that support sustainability and security in connected devices.
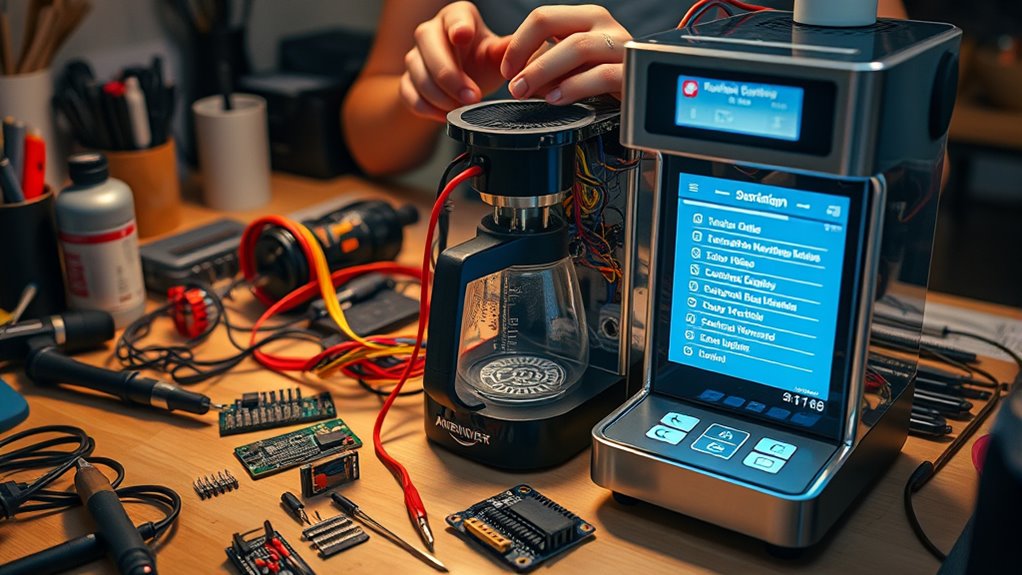
Building a Smart Coffee Maker From Scratch
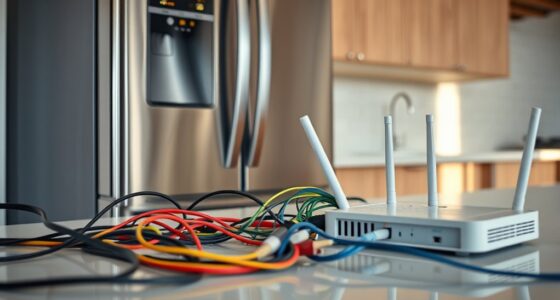
To build a smart coffee maker from scratch, you’ll need key hardware components like a microcontroller, relays, sensors, and a water heater. Once assembled, you can program the system to automate brewing, monitor temperature, and even connect it to your home network. This project combines hands-on hardware work with programming to create a personalized coffee experience. Incorporating connected cooking techniques allows for seamless integration with other smart home devices, enhancing automation and user control. Additionally, understanding wiring basics ensures safe and reliable operation of your custom appliance. Leveraging smart contract technology can further automate purchase and inventory management for your coffee supplies, adding an extra layer of intelligence to your setup. Exploring home automation protocols can improve your system’s compatibility with existing smart devices, and studying sensor integration can help optimize performance and responsiveness.
Hardware Components Needed
Building a smart coffee maker from scratch requires gathering several key hardware components that work together seamlessly. First, you’ll need a microcontroller or single-board computer, like a Raspberry Pi or Arduino, to control the system. A heating element or water boiler guarantees your coffee brews at the right temperature. A relay module or solid-state switch manages power to the heater safely. You’ll also need sensors, such as temperature sensors or flow meters, for monitoring brewing conditions. Incorporate a water reservoir and a coffee filter mechanism, keeping in mind your kitchen aesthetics to make certain the device fits well with your space. Ingredient sourcing is critical; select quality coffee and water components for ideal flavor. Additionally, understanding the net worth of influencers can provide insights into their credibility and market value, which could be useful if you plan to incorporate social media components into your smart device. To enhance user experience, consider integrating user interface options like buttons or a touchscreen for easy operation. Proper component compatibility ensures all parts work together without issues, simplifying assembly and operation. Moreover, exploring herbal traditions can inspire innovative features or natural flavoring options for your device.
Programming and Automation
Once you’ve assembled all the necessary hardware components, the next step is to program the microcontroller or single-board computer to automate the coffee-making process. Focus on creating a clean, intuitive code that allows for recipe optimization, guaranteeing your brew is just right every time. Incorporate sensors and timers to streamline the workflow, enhancing kitchen ergonomics by reducing unnecessary steps. Consider these key points:
- Use modular code to easily tweak brewing parameters for personalized flavors
- Implement safety checks to prevent accidents and improve reliability
- Design an intuitive interface for quick adjustments, aligning with efficient kitchen layouts
- Prioritize user comfort by designing your system to minimize effort and enhance ease of use
- Additionally, understanding networking hardware can help you connect your smart appliance seamlessly within your home automation system, ensuring reliable communication and control. Familiarity with home automation protocols can further optimize device integration and responsiveness. Gaining knowledge of wireless communication standards can also improve connectivity and reduce latency issues. Investing in reliable connectivity components helps maintain consistent operation and minimizes interruptions during use.
This approach ensures your smart coffee maker is both functional and user-friendly, making your morning routine smoother and more customizable.
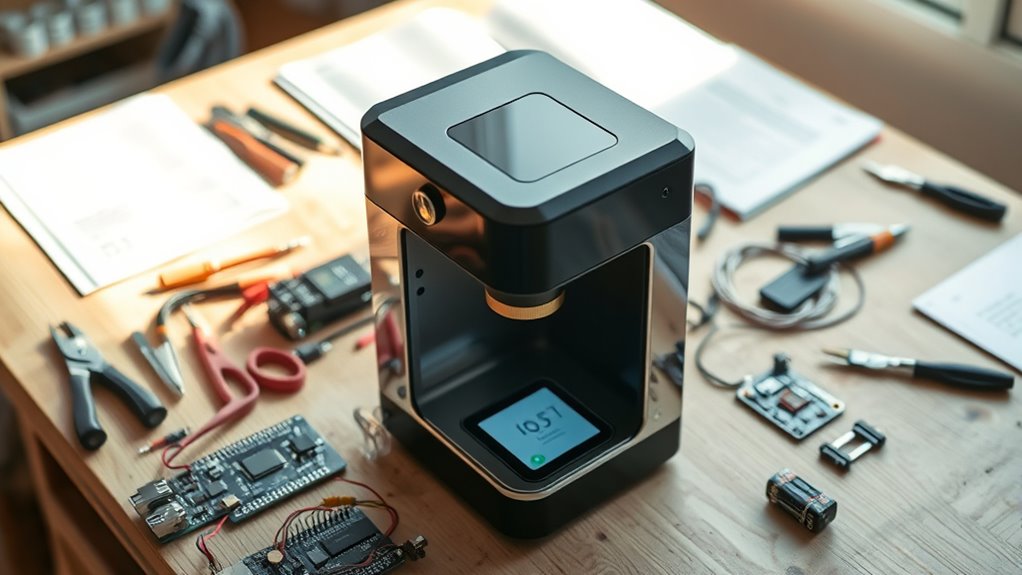
Automating Pantry Inventory With RFID and Arduino
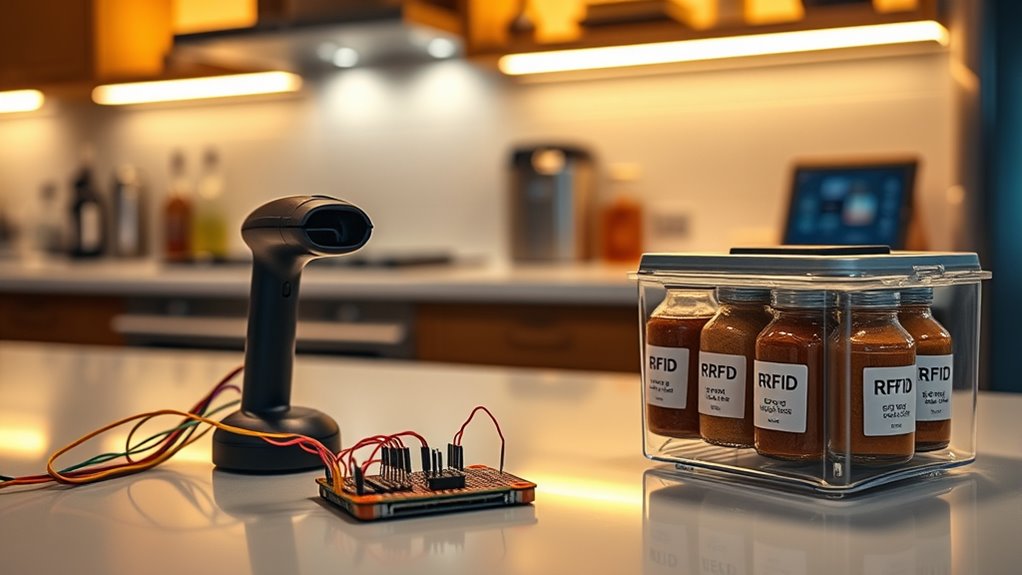
Automating pantry inventory with RFID and Arduino transforms how you track food supplies, making the process faster and more accurate. RFID integration allows you to identify each item quickly as it enters or leaves your pantry, streamlining inventory management. By attaching RFID tags to your products and setting up an Arduino-based reader, you can automatically log items without manual entry. This system updates your inventory in real-time, helping prevent overstocking or running out of essentials. You can program your Arduino to communicate with a database or display, providing instant visibility into your supplies. This DIY approach reduces waste, saves time, and keeps your pantry organized. Incorporating support for breakfast ideas can make your mornings more enjoyable and nutritious. With some basic coding and hardware, you turn your kitchen into a smart, efficient space that’s easy to maintain. Understanding repair fundamentals can also help troubleshoot any technical issues that may arise with your DIY setup.
Creating a Custom Sous Vide Controller

Ever wondered how to achieve precise temperature control for perfect sous vide cooking? Building your own controller allows you to fine-tune your setup. Focus on key aspects like accurate temperature calibration to ensure your water stays at the desired level. Proper water circulation is crucial for even heat distribution, preventing hot spots or cold areas. When designing your controller, consider these points:
Achieve perfect sous vide with precise calibration and effective water circulation.
- Use reliable sensors and calibrate them regularly for consistent results.
- Incorporate a pump or circulation system to maintain uniform water temperature.
- Implement adjustable settings for easy control over cooking parameters.
- Regular testing of Body jewelry measurements and materials can help optimize your setup and ensure the longevity of your DIY project. Additionally, understanding passive voice detection can improve the clarity of your technical documentation and troubleshooting guides.
DIY Smart Refrigerator Monitoring Systems

To build an effective DIY smart refrigerator monitoring system, you’ll want to focus on sensor integration techniques that capture temperature, humidity, and door status accurately. Data visualization methods help you interpret the sensor data clearly, while alerts and notifications keep you informed of any issues. With the right approach, you can create a reliable system that simplifies fridge management and reduces waste.
Sensor Integration Techniques
Sensor integration is the key to creating an effective DIY smart refrigerator monitoring system. To guarantee accurate data, focus on proper sensor calibration, which aligns sensor readings with real-world values. Signal filtering also plays a crucial role, removing noise and preventing false alerts. When integrating sensors, consider these aspects:
- Regularly calibrate sensors to maintain measurement accuracy
- Use filtering techniques like moving averages to smooth data
- Choose appropriate sensors for temperature, humidity, and door status
Data Visualization Methods
Effective data visualization transforms raw sensor data into clear, actionable insights, making it easier to monitor and manage your smart refrigerator. By using graphs, charts, and dashboards, you can easily interpret temperature fluctuations, door openings, and humidity levels. Data visualization tools like Grafana, Plotly, or custom dashboards help you analyze data trends over time, highlighting patterns that might indicate issues or inefficiencies. These methods simplify data analysis, allowing you to quickly identify anomalies or optimize performance. Visual representations enable you to make informed decisions without sifting through raw numbers. Incorporating intuitive visuals into your monitoring system ensures you stay on top of your refrigerator’s health, extending its lifespan and maintaining food quality through clear, effective data analysis.
Alerts and Notifications
Setting up alerts and notifications is essential for maintaining your smart refrigerator’s peak performance, especially when issues arise unexpectedly. By implementing alarm systems and clear notification protocols, you guarantee timely responses to problems like temperature drops or door left open. You can customize alerts to trigger via email, SMS, or app notifications, keeping you informed wherever you are. Focus on these key aspects:
- Choosing reliable alarm systems to prevent missed alerts
- Designing effective notification protocols for prompt action
- Ensuring your system minimizes false alarms while maximizing responsiveness
This setup helps you catch potential issues early, avoid spoiled food, and maintain energy efficiency. With a well-crafted alert system, you stay in control, quickly addressing faults before they escalate.
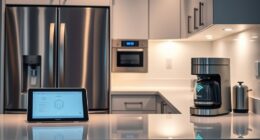
Integrating Voice Assistants With Kitchen Appliances

Integrating voice assistants with kitchen appliances allows you to control your devices hands-free, making cooking and meal prep more convenient. With a voice assistant, you can start your coffee maker, adjust oven temperatures, or check refrigerator inventory without interrupting your flow. This integration enhances your smart home setup, creating seamless interactions between devices. By connecting open-source platforms like Mycroft or Home Assistant to your appliances, you gain customizable control options tailored to your needs. Voice commands can trigger routines, such as turning on lights or setting timers while cooking. This approach simplifies kitchen tasks, reduces clutter, and keeps your hands free for food prep. Overall, integrating voice assistants makes your kitchen smarter, more efficient, and easier to manage.
Designing a Wi-Fi Enabled Spice Dispenser

Building on the convenience of voice-controlled kitchen devices, a Wi-Fi-enabled spice dispenser brings automation and organization directly to your spice rack. With this project, you can automate spice dispensing, keep track of spice levels, and easily reorder supplies. To design your spice dispenser, consider these key aspects:
- Integrate sensors for real-time spice level monitoring
- Connect the dispenser to your Wi-Fi network for remote control
- Use open-source hardware and software for customization and cost-efficiency
This setup enhances kitchen automation by reducing clutter and ensuring your spices are always at hand. You’ll enjoy more seamless cooking experiences, less waste, and better spice management. Building your own Wi-Fi spice dispenser empowers you to tailor your kitchen technology to your needs.
Using Open-Source Software for Meal Planning and Tracking
Open-source software offers powerful tools for meal planning and tracking that put you in control of your kitchen routines. With these tools, you can customize nutrition tracking to fit your dietary needs, ensuring you meet your health goals. Many open-source platforms feature meal planning algorithms that suggest recipes based on available ingredients, preferences, or nutritional targets. By integrating these programs into your DIY kitchen setup, you gain real-time insights into your nutritional intake and streamline grocery shopping. You can also modify the software to include features like calorie counting or allergen alerts, tailoring it precisely to your lifestyle. Using open-source solutions not only saves money but also gives you the freedom to adapt and improve your meal planning system as your needs evolve.
Tips for Maintaining and Upgrading Your DIY Kitchen Devices

Regular maintenance is essential to keep your DIY kitchen devices running smoothly and efficiently. Follow a solid maintenance checklist to identify issues early and prevent breakdowns. Regularly clean sensors, wires, and connections to avoid build-up and ensure accurate operation. When considering hardware upgrade tips, focus on compatibility and performance improvements—upgrading sensors, processors, or power supplies can boost efficiency.
Remember:
- Keep detailed records of maintenance activities for troubleshooting.
- Use open-source firmware updates when available to enhance features.
- Regularly evaluate device performance to decide if hardware upgrades are necessary.
Staying proactive with maintenance and upgrades extends your device’s lifespan and keeps your smart kitchen operating at its best.
Frequently Asked Questions
What Safety Precautions Should I Consider When Building DIY Kitchen Appliances?
When building DIY kitchen appliances, prioritize electrical safety by inspecting wiring, avoiding short circuits, and using proper insulation. Also, consider food safety to prevent contamination; guarantee materials are food-grade and easy to clean. Always disconnect power before working on electronics, follow safety guidelines, and test thoroughly before use. By staying cautious about electrical hazards and food safety, you protect yourself and ensure your appliance functions safely and effectively.
Are There Any Legal or Warranty Issues With Modifying Kitchen Devices?
Modifying kitchen devices can void your warranty and create legal liability if something goes wrong. You might lose manufacturer support, and if your modifications cause damage or injury, you could face legal issues. Always check your device’s warranty terms and local laws before customizing. By understanding these risks, you can make informed decisions and avoid unexpected costs or legal trouble when working on DIY kitchen appliances.
How Can I Ensure My Open-Source Kitchen Projects Are Secure From Hacking?
To keep your open-source kitchen projects secure from hacking, you should implement strong encryption protocols to protect data in transit and at rest. Additionally, set up robust access controls, like multi-factor authentication and unique passwords, to restrict device access. Regularly update your firmware and software to patch vulnerabilities. Staying vigilant about security practices guarantees your smart appliances remain safe, reliable, and resistant to potential cyber threats.
What Tools and Skills Are Necessary for Beginners in Open-Source Kitchen Tech?
To get started with open-source kitchen tech, you need basic coding fundamentals like Arduino or Python, along with troubleshooting skills. Sensor integration is key, so learn how to connect and program sensors to gather data from your appliances. Practice simple projects first, then gradually expand your knowledge. Familiarize yourself with online tutorials and community forums to troubleshoot and enhance your skills, making your DIY smart appliances more effective and secure.
How Do I Troubleshoot Common Issues in DIY Smart Kitchen Devices?
When troubleshooting your DIY smart kitchen devices, start by checking for power supply issues, ensuring all connections are secure and power sources are functioning. If sensors aren’t working correctly, focus on sensor calibration, following the manufacturer’s instructions to adjust readings. Use a multimeter for electrical checks and review your wiring. Testing components systematically helps identify whether the problem lies in the power or sensors, making repairs easier.
Conclusion
By exploring these open-source kitchen projects, you’re empowering yourself to create a smarter, more personalized space. With DIY tech, you gain control, flexibility, and a sense of achievement. Will you take the leap and turn your kitchen into a hub of innovation? Embrace the challenge, and you’ll discover how accessible and rewarding building your own appliances can be. After all, isn’t a kitchen that adapts to you worth the effort?