
To finish meats perfectly after sous vide, start by thoroughly drying your meat to prevent steaming and guarantee a good sear. Preheat your pan to a high temperature, using a heat-resistant skillet and high-smoke point oil. Sear each side for 1-2 minutes until a deep, even crust forms, then let it rest. Adjust your technique based on equipment and meat type, and you’ll master a restaurant-quality finish. Keep going, and you’ll uncover even more tips for perfect searing.
Key Takeaways
- Pat meat dry thoroughly to remove surface moisture, ensuring a better sear and preventing steaming or splattering.
- Preheat the skillet or searing surface until just smoking for optimal crust development.
- Use high-smoke point oils like avocado or grapeseed to achieve even browning without burning.
- Sear each side for 1-2 minutes until a deep, caramelized crust forms, then rest briefly before slicing.
- Maintain consistent high heat and avoid overcooking the interior to preserve sous vide tenderness.
Choosing the Right Equipment for Searing
Choosing the right equipment for searing is essential to achieve a perfect crust without overcooking the interior. Safety considerations should be your top priority; use tools that are heat-resistant and handle high temperatures safely. A cast iron skillet is ideal because it retains heat evenly and provides a great sear, but make certain it’s well-maintained to prevent rust and uneven heating. A heavy-bottomed pan also works well if properly cared for. Regular equipment maintenance, like cleaning and checking for damage, ensures consistent results and safe operation. Avoid cheap or damaged tools, as they can pose safety risks or lead to poor searing outcomes. Additionally, selecting equipment made from safe, heat-resistant materials helps prevent accidents and ensures durability. Considering the proper cookware material can further enhance your searing results and safety. When choosing your equipment, also consider equipment durability to ensure long-term performance and safety. By selecting quality, well-maintained equipment, you set yourself up for a flawless finish every time.
Preparing Your Meat for the Perfect Sear

To get a perfect sear, start by patting your meat dry to remove excess moisture. Season it evenly before searing to build flavor, and make certain your pan is at the right temperature to achieve that ideal crust. Paying attention to these steps will ensure your meat sears beautifully every time. Additionally, ensuring your meat is free from excessive moisture can prevent unwanted odors and help achieve a better sear. Properly drying meat also reduces the risk of bacterial growth, making your cooking process safer and more efficient. Maintaining air quality in your kitchen by keeping the space clean can further improve your cooking environment. Incorporating connected kitchen devices can help monitor and optimize your cooking process, leading to consistently perfect results. Being aware of precious metal investment options can also inspire you to explore other high-quality cooking tools and accessories that can enhance your culinary experience.
Pat Drying Techniques
Before you sear your meat, it’s essential to pat it dry thoroughly. Proper drying techniques prevent excess moisture, which can cause steaming instead of browning. Use clean paper towels or a lint-free cloth to gently pat the surface, focusing on any areas with visible moisture. Be thorough but gentle, ensuring you remove surface liquids without tearing the meat’s surface. Pat drying helps achieve a crisp, caramelized crust and prevents splattering in the pan. For best results, let the meat sit uncovered on a wire rack for a few minutes after patting to allow residual moisture to evaporate. This extra step ensures your sear is even and beautiful, giving your meat that perfect, restaurant-quality crust every time. Additionally, understanding heat distribution can help you select the best pan or burner setting for an optimal sear. Paying attention to lighting conditions in your kitchen can also help you better assess when the meat is ready to flip or serve. To further improve searing results, consider using a preheated pan to ensure consistent browning across the surface. Being aware of sustainable cooking practices can also enhance your overall culinary approach and reduce energy consumption in your kitchen. Incorporating proper piercing care and hygiene techniques can prevent infections and ensure a safe cooking environment, especially when handling raw meats.
Seasoning Before Sear
After patting your meat dry, the next step is to season it to enhance flavor and help develop a beautiful crust. Use marinade tips like applying a light coat of oil or a simple salt and pepper mix to promote browning. Let the meat rest for a few minutes after seasoning; this resting technique allows the flavors to penetrate and the surface to dry slightly, which is vital for a good sear. Avoid over-seasoning before the final sear, as it can burn and create a bitter taste. If you prefer, you can season with dry spices just before searing for maximum flavor. Proper seasoning and resting ensure your meat is flavorful, well-textured, and ready for that perfect, crusty finish.
Optimal Searing Temperature
Achieving the perfect sear starts with heating your pan or grill to the right temperature. If it’s too hot, you risk burning the surface; too cool, you’ll end up steaming instead of searing. Use these tips to find that sweet spot:
- Preheat thoroughly until the pan is just beginning to smoke—this ensures even browning and a crispy crust.
- Adjust based on marinate techniques—if you’ve marinated your meat, wait a moment to remove excess moisture, which can hinder browning.
- Rest your meat after sous vide—allow it to reach room temperature, so the heat penetrates evenly, giving you a consistent sear.
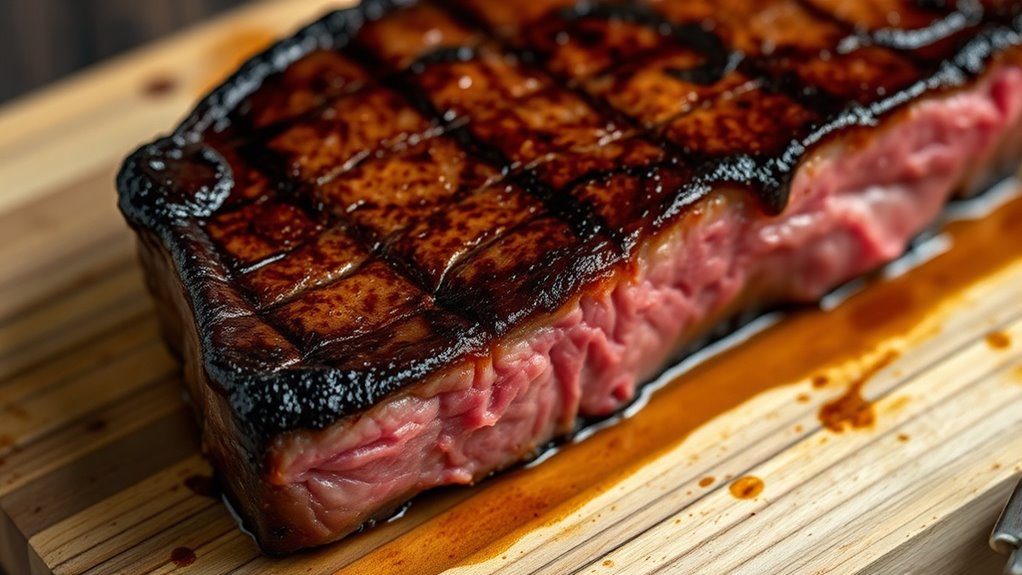
Optimal Techniques for Searing Post-Sous Vide
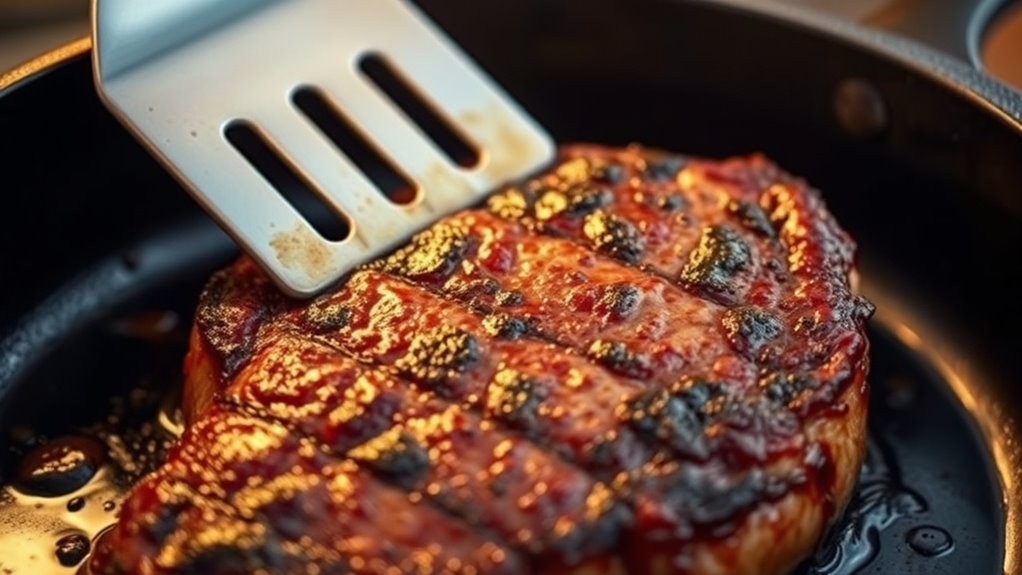
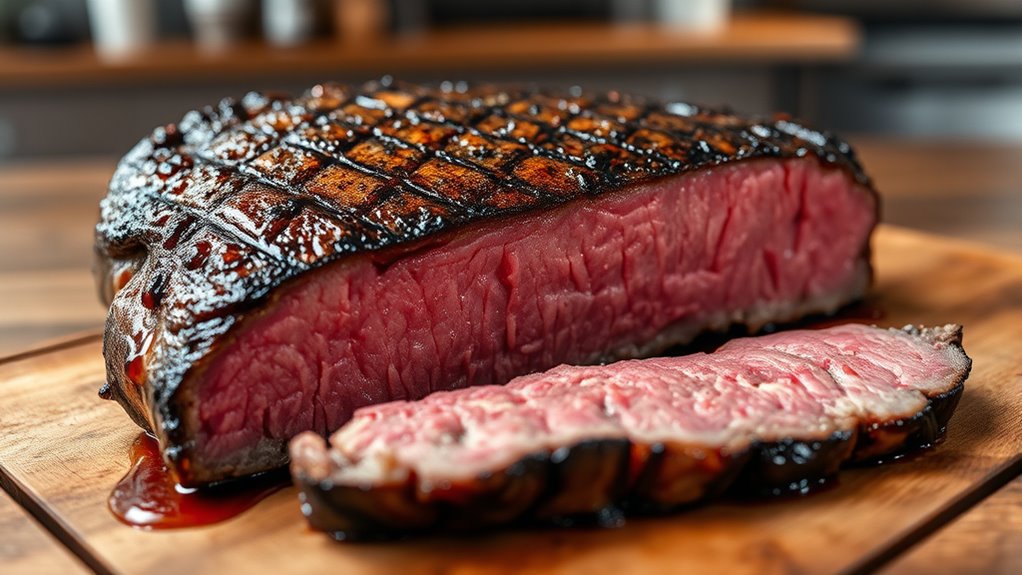
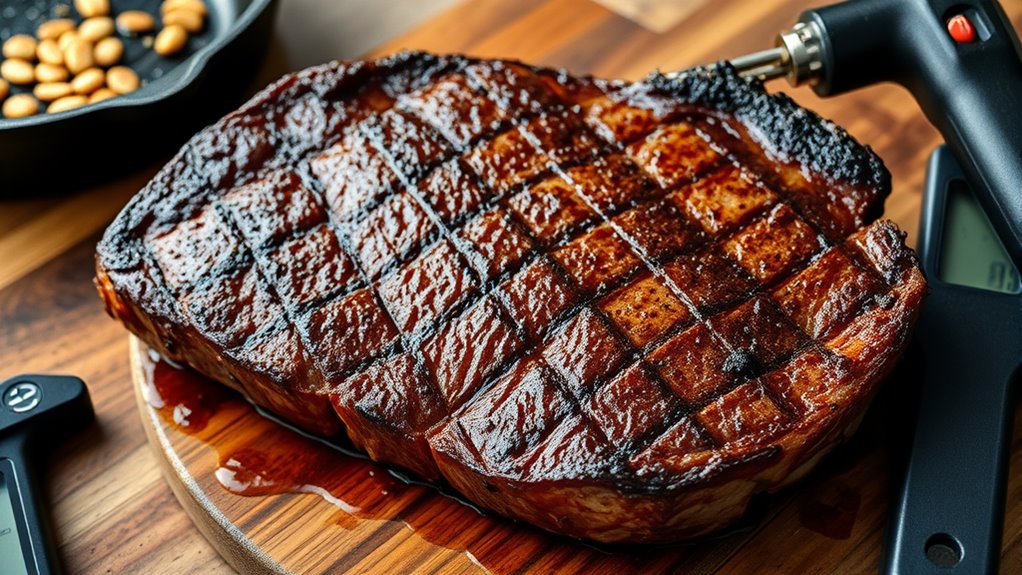
To get a perfect sear after sous vide, selecting the right tools and techniques makes all the difference. Use a cast-iron skillet or a heavy-duty pan to guarantee even heat distribution. Before searing, let your meat rest briefly to allow juices to redistribute, which helps maintain moisture and flavor. Incorporate marinate preparations if you want added flavor, but wipe excess marinade to prevent flare-ups. Keep the pan hot—around 400-450°F—and add a high smoke-point oil like avocado or grapeseed oil. Sear each side for 1-2 minutes until a deep, caramelized crust forms. Use tongs to flip the meat regularly and avoid pressing down, which can squeeze out juices. Rest the meat briefly after searing to lock in those flavors and juices. proper heat management is crucial for achieving a perfectly seared crust without overcooking the interior. Additionally, employing digital thermometers can help monitor surface temperatures precisely for consistent results. Understanding heat distribution helps prevent hot spots and ensures an even sear across the meat’s surface. Incorporating smart kitchen appliances with temperature sensors can further enhance control and precision during the searing process.
Enhancing Flavor and Color During Searing
To boost flavor and color during searing, you need to focus on the right temperature and quality fats. Using an ideal searing temperature ensures a perfect crust without overcooking, while high-quality fats enhance richness and help create beautiful browning. Pay attention to these points to achieve a flavorful, visually appealing finish. Additionally, choosing the right natural ingredients can contribute to a more wholesome flavor profile and overall better results. Incorporating ethical fashion trends that support sustainable and responsible sourcing can also influence the quality of ingredients used in your cooking. Proper filtration and maintaining your tools ensure consistent heat transfer and optimal searing conditions, leading to better overall results. Being mindful of safety considerations during searing helps prevent accidents and ensures a smooth cooking process. For consistent results, consider air fryer technology which can help in managing temperature and cooking times effectively.
Optimal Searing Temperature
Getting the temperature right during searing is essential for developing rich flavor and appealing color. When you hit the ideal searing temperature, you create a delicious crust that complements the internal temperature of your meat. To achieve this, focus on these key points:
- Maintain the searing surface at around 400-450°F to quickly develop color without overcooking.
- Watch the internal temperature closely; aim for a slight increase just before your desired finish.
- Use a thin layer of high-smoke point oil to guarantee even heat transfer and prevent sticking.
- Understanding heat transfer methods can help you optimize your searing process for better results. Additionally, controlling the searing temperature precisely ensures the Maillard reaction occurs optimally, enhancing flavor and texture.
This precise temperature control guarantees your meat develops a beautiful, flavorful crust while staying tender inside. Proper searing temperature unlocks the full potential of your sous vide-cooked meat, making every bite irresistible.
Using High-Quality Fats
Using high-quality fats during searing makes a significant difference in both flavor and color. Opt for oils with high smoke points, like refined avocado or grapeseed oil, to prevent burning and achieve a perfect sear. A well-seasoned cast iron skillet distributes heat evenly, ensuring your meat develops a rich crust without overcooking. The right oil enhances caramelization, adding depth to flavor and a beautiful, appetizing color. Avoid cheap or flavored oils that can burn or impart unwanted tastes. When selecting fats, consider smoke point, flavor profile, and heat tolerance. Here’s a quick guide:
| Oil Type | Smoke Point | Best Use |
|---|---|---|
| Refined Avocado | 520°F | High-temperature searing |
| Grape Seed | 420°F | Quick, high-heat cooking |
| Clarified Butter | 450°F | Flavorful, high-temp searing |
| Light Olive Oil | 468°F | Versatile for finishing |
Timing and Temperature Tips for a Perfect Finish

Achieving the perfect sear after sous vide hinges on precise timing and temperature control. To maximize flavor and texture, consider these tips:
- Monitor your heat carefully—a hot pan or grill ensures a quick, even sear without overcooking.
- Limit searing time—around 1-2 minutes per side prevents burning and preserves juiciness.
- Incorporate resting strategies—let the meat rest briefly after searing to redistribute juices, enhancing tenderness.
Marinating techniques before sous vide can add depth, but don’t forget that a good sear needs the right temperature. Keep your tools hot and your timing sharp for that perfect crust every time. Mastering these subtle adjustments guarantees a mouthwatering, restaurant-quality finish.
Finishing Touches and Presentation Ideas
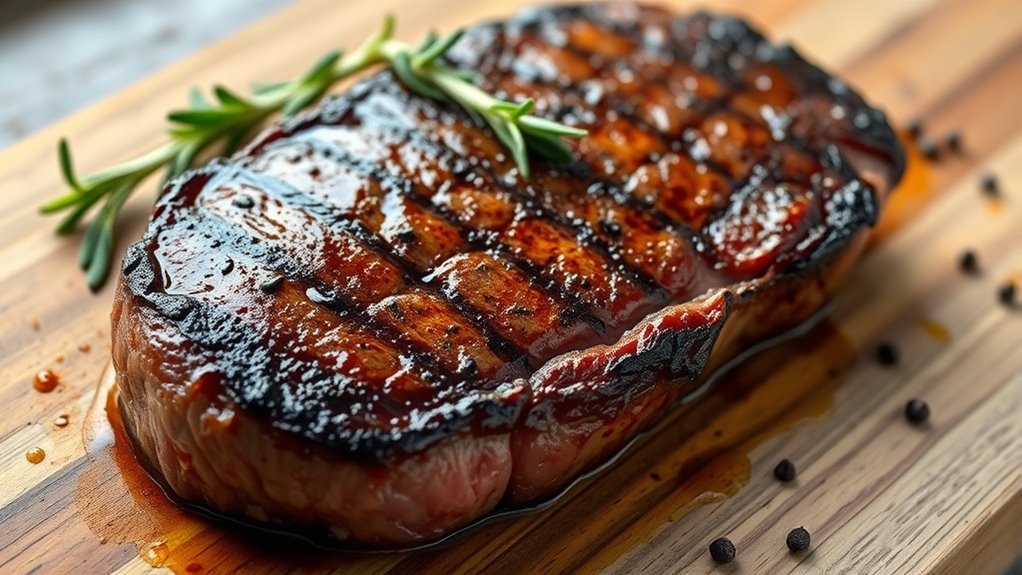
Ever wonder how to elevate your sous vide dish from great to stunning? The key lies in finishing touches that enhance plating aesthetics and create visual appeal. Start by choosing a clean, attractive plate that complements your meat. Use garnishing techniques such as fresh herbs, microgreens, or colorful vegetable accents to add vibrancy. Drizzle sauces carefully, aiming for elegant lines or dots that highlight the dish without overwhelming it. Pay attention to symmetry and balance, arranging slices or components thoughtfully. A well-executed presentation not only makes your dish more appetizing but also shows your attention to detail. Remember, simple yet strategic garnishes can transform a perfectly cooked meat into a culinary masterpiece worthy of admiration.
Frequently Asked Questions
Can I Sear Frozen Meat After Sous Vide?
Yes, you can sear frozen meat after sous vide. Just remember to thaw it properly using safe thawing techniques like refrigeration or cold water. When searing, use a high searing temperature to quickly develop a crust without overcooking the interior. Pat the meat dry first to prevent steaming, and sear it for a short, intense period until you get that perfect brown crust.
How Do I Prevent Smoke When Searing?
To prevent smoke during searing, start with a dry, well-absorbed surface on your meat. Use a high-smoke-point cooking oil like avocado or canola, and heat your pan to a hot, precise temperature. Keep the heat controlled, and avoid overcrowding the pan, which can cause steaming instead of searing. This technique helps you achieve a perfect crust without creating excessive smoke or burning.
Is Cast Iron the Best Pan for Searing?
Yes, cast iron is excellent for searing because of its even heat distribution and heat retention. Its benefits include creating a consistent sear at the right sear temperature, giving your meat a perfect crust. Plus, a well-seasoned cast iron pan can handle high heat without sticking or smoking excessively. Just make certain your pan is preheated properly, and you’ll get that beautifully caramelized finish every time.
Can I Sear Multiple Pieces at Once?
Yes, you can sear multiple pieces at once, but you need to carefully arrange the meat to avoid overcrowding. Keep the pieces spaced out evenly, allowing heat to circulate and promote uniform searing. Use a high searing temperature to develop a good crust without steaming the meat. Proper meat arrangement and maintaining the right searing temperature are key to achieving perfect, evenly seared results on all pieces.
How Long Can I Hold Meat After Searing?
You can hold meat after searing for up to two hours if you maintain proper temperature control and resting time. Think of it like a gentle pause; keeping the meat at 140°F (60°C) prevents bacteria growth and preserves quality. Resting allows juices to redistribute, so avoid leaving it too long. For ideal results, serve within this window to enjoy tender, flavorful meat without risking overcooking or spoilage.
Conclusion
Think of searing after sous vide like adding the final brushstroke to a masterpiece—you want it just right. When I first started, I’d rush the sear and miss that perfect crust, but now I know it’s about patience and technique. With the right equipment and timing, your meat transforms from good to unforgettable. Master this finish, and every bite will feel like a culinary triumph—delicious, beautiful, and perfectly crafted.