
To finish meats perfectly after sous vide, start by thoroughly drying the surface with paper towels to prevent steaming. Preheat a high-quality skillet, ideally cast iron, to around 425°F, test with a water droplet that sizzles instantly. Use high smoke point oil, sear each side 45 seconds to 2 minutes until deep golden, then rest the meat briefly. For expert tips on perfect searing techniques and equipment, keep exploring the essentials.
Key Takeaways
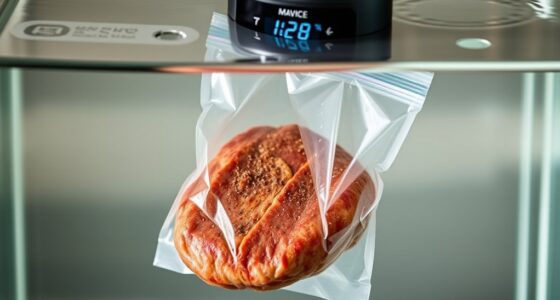
- Pat dry the meat thoroughly to remove surface moisture, ensuring proper caramelization during searing.
- Preheat a heavy pan to 425–450°F using the water droplet test for consistent high heat.
- Use high smoke point oils like avocado or grapeseed to prevent burning and promote even browning.
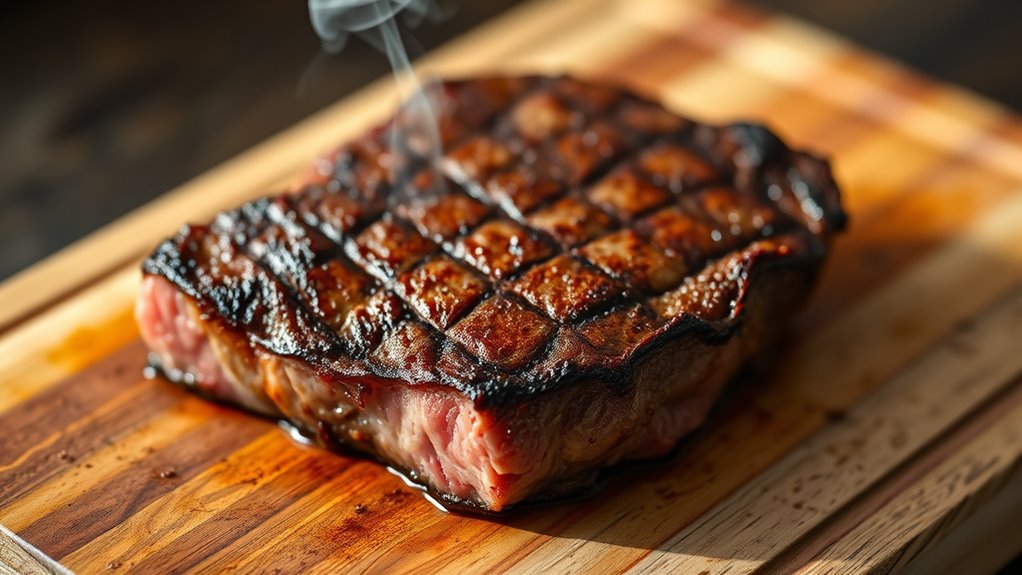
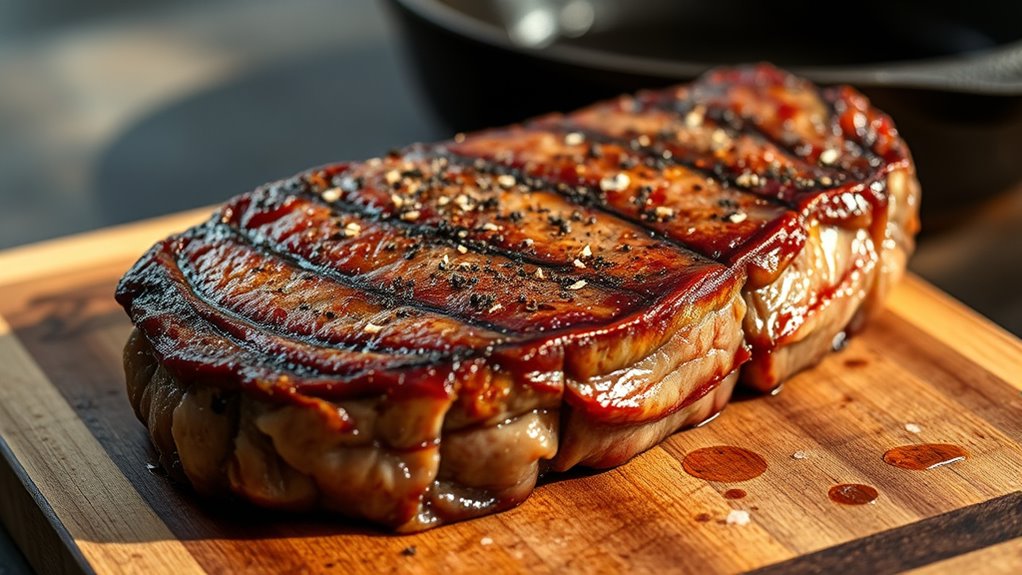
- Sear each side for 30 seconds to 2 minutes, maintaining contact until a deep, golden crust forms.
- Rest the meat briefly after searing, then add finishing salt or herbs for enhanced flavor and texture.
The Importance of Proper Meat Drying Before Searing

Drying meat thoroughly before searing is essential because surface moisture prevents proper caramelization. Water on the surface turns to steam at 100°C/212°F, which halts browning and blocks the development of a flavorful crust. To guarantee thorough dryness, pat the meat with paper towels immediately after removing it from the vacuum-sealed bag. Place the meat on a paper towel-lined plate for a few minutes to draw out excess moisture from the bottom side. Let it sit at room temperature briefly to allow any remaining surface water to evaporate. Incorporating smart kitchen appliances such as moisture sensors can help monitor and achieve optimal dryness more consistently. Using innovative European cloud servers for data processing and monitoring can enhance precision in the drying process and ensure consistent results. Employing digital humidity control can also help maintain ideal conditions during this step. Additionally, precise moisture measurement techniques can further ensure the meat is perfectly dry before searing. Recognizing the importance of proper meat handling can prevent moisture buildup and ensure a perfect sear. Skipping this step results in a less appealing, soggy sear that lacks flavor and texture.
Achieving the Right Pan Temperature for a Perfect Sear

To achieve a perfect sear, your pan must be heated to an extremely hot temperature, typically between 425°F and 450°F (218-232°C). This high heat ensures rapid caramelization and crust formation without overcooking the interior. Use the water droplet test: a drop should sizzle and evaporate instantly. Preheat your pan thoroughly, then add a thin layer of oil with a high smoke point. Cast-iron skillets are ideal for maintaining consistent heat. Keep in mind the following:
| Key Aspect | Purpose |
|---|---|
| Pan Temperature | Achieve rapid browning and crusting |
| Oil Smoke Point | Prevent smoking and burning |
| Heating Method | Ensure uniform heat distribution |
A high-quality skillet can help maintain consistent heat across the cooking surface. Proper temperature control techniques are essential for consistent results and to prevent overcooking. Maintaining a proper heat level during searing is crucial to avoid burning the exterior before the interior reaches the desired doneness. Ensuring precise heat management can make the difference between a good sear and a perfect one. Mastering these elements guarantees a beautifully seared exterior.
Selecting the Best Oil and Equipment for Searing
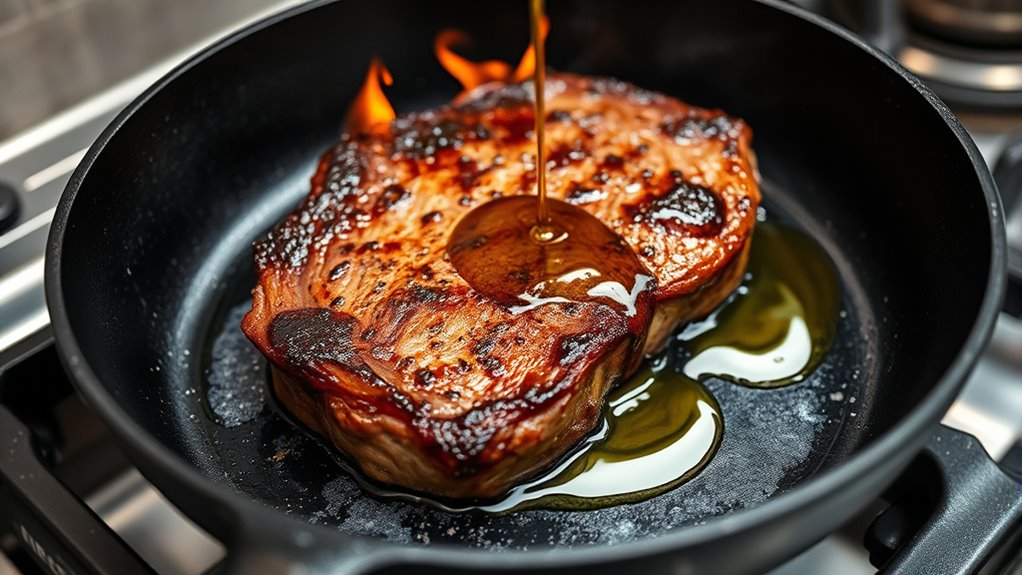
Choosing the right oil and equipment can make or break your searing results. Use high smoke point oils like avocado, grapeseed, or refined canola to prevent burning and guarantee even browning. Avoid olive oil or butter, which smoke at lower temperatures. For equipment, a cast-iron skillet is ideal because it retains heat well, providing a consistent sear. A heavy-bottomed stainless steel pan also works effectively. For delicate proteins like fish, a propane torch offers precise control, creating a crust without overcooking. Grills and specialized induction burners can also be used for searing, depending on your setup. Whichever you choose, ensure the equipment is preheated thoroughly for an even, caramelized crust. Proper oil selection and quality equipment are essential for achieving that perfect sear after sous vide. Additionally, understanding heat transfer principles can help optimize your searing technique for better results. Incorporating temperature control methods can further improve your ability to achieve the desired crust without overcooking. Mastering heat distribution can also lead to more consistent, professional-looking results, especially when you leverage modern smart cookware that provides real-time feedback and precise temperature adjustments. Moreover, selecting equipment that supports consistent heat can significantly enhance your searing outcomes.
Techniques for Optimal Searing Time and Contact

Getting the perfect sear depends on maintaining proper contact between the meat and the hot pan for the right amount of time. You should resist the urge to flip the meat too early or too often, as this can prevent a good crust from forming. Also, don’t forget to sear the edges for a few seconds to add flavor and texture to every part of your protein. Utilizing proper heat control ensures consistent contact and optimal browning during searing.
Proper Contact Duration
Achieving the perfect sear depends heavily on the contact duration between the meat and the hot pan. You want enough time to develop a deep, flavorful crust without overcooking the interior. Typically, 45 seconds to 2 minutes per side is ideal, depending on the thickness and protein type. Resist the temptation to flip too early—wait until you see a rich, caramelized color forming. Press the meat lightly against the pan to guarantee consistent contact, especially for uneven surfaces. For delicate proteins like fish, shorter contact times prevent overcooking. Keep an eye on the clock, and avoid moving the meat around excessively. Proper contact duration is vital for achieving that perfect, crispy crust while maintaining the meat’s tender interior.
Gentle Flipping Technique
To guarantee a perfect sear, you need to flip the meat gently and deliberately rather than forcefully or repeatedly. Use tongs or a spatula to lift and turn the meat smoothly, avoiding unnecessary movement that could tear the crust. Wait until a deep, golden-brown crust has formed on one side—typically after the minimum contact time—and then flip carefully. Applying gentle pressure helps maintain uniform contact without disrupting the sear. Repeated flipping or pressing can prevent crust formation and cause uneven caramelization. Be patient; allow each side to develop a rich, flavorful crust before flipping again. This deliberate approach ensures even searing, preserves the meat’s integrity, and results in a beautifully caramelized exterior.
Edge Searing Strategy
What’s the best way to sear meat edges effectively? First, verify your meat’s surface is completely dry. Pat it thoroughly with paper towels, especially on the edges, to remove moisture that can steam and hinder browning. Preheat your pan to at least 425°F, testing with a water droplet that sizzles instantly. Use a high smoke point oil, heating it until it just begins to shimmer. For edges, hold the meat with tongs and rotate it slowly, searing each side for about 45 seconds. Apply gentle pressure to maintain contact, especially on delicate areas. Keep your movements steady and avoid flipping or shifting meat excessively. Proper timing and contact ensure a crispy, caramelized crust on every edge without overcooking the interior.
How to Season and Prepare Meat for the Final Sear
Seasoning meat before the final sear enhances flavor and helps develop a flavorful crust. To get the best results, pat the meat thoroughly dry with paper towels, removing surface moisture that can hinder browning. Proper butter storage is essential to maintain quality and prevent spoilage, which can affect the flavor of your dish. Place it on a paper towel-lined plate, letting it sit for a few minutes at room temperature to evaporate excess moisture. Before searing, apply a generous layer of salt, pepper, and spices. This creates a delicious crust and deepens flavors. Visualize the process with this table:
| Surface | Preparation | Effect |
|---|---|---|
| Top | Seasoned with salt and spices | Enhances crust and flavor |
| Bottom | Dries on paper towels | Promotes even browning |
| Edges | Lightly scored or pressed | Ensures full contact for searing |
Additionally, understanding the importance of proper food handling techniques can further improve your cooking results. Paying attention to safe meat temperature guidelines ensures that your final product is both delicious and safe to eat.
Tips for Searing Different Types of Proteins
Different proteins require tailored searing times and techniques to achieve the best crust and flavor. Delicate fish need careful handling and shorter searing, while meats like steak benefit from longer, more vigorous contact. Pay attention to skin and crust methods to optimize texture and appearance for each protein type. Using a properly heated pan ensures even searing and prevents sticking or overcooking. For consistent results, understanding heat management is essential to avoid burning or under-searing the proteins. Additionally, selecting the appropriate jewelry materials for your cooking environment can prevent potential contamination or reactions during the searing process. Incorporating designer-inspired techniques can elevate the presentation and overall impression of your finished dish, making it as visually appealing as it is flavorful.
Protein-Specific Searing Times
Searing times vary considerably depending on the type of protein you’re working with, so adjusting your technique is essential for ideal results. For steaks, aim for about 1 to 2 minutes per side to develop a deep, golden crust, ensuring the surface is hot enough. Thin cuts like chicken cutlets need roughly 1 minute per side to prevent overcooking. Salmon generally requires 2 minutes skin-side at 450°F, then 30 seconds on the flesh side for a crispy finish. Delicate fish, such as sole or flounder, benefit from shorter searing—around 30 seconds per side—to avoid overcooking. Poultry skins should be scored and seared for 1-2 minutes at 385°F to render fat and crisp the skin. Always monitor to prevent burning or drying out.
Handling Delicate Fish
Because delicate fish have a fragile texture and thin flesh, you need to handle them with extra care during searing. Start by thoroughly drying the fish with paper towels to remove surface moisture, which can cause steaming and prevent browning. Use a preheated pan at around 425°F, with a small amount of high smoke point oil. Gently place the fish skin-side down if it has skin, pressing lightly to ensure contact. Sear for just 1-2 minutes until a golden crust forms, then flip carefully and sear the other side briefly. Avoid overflipping or applying excessive pressure, as this can break apart the delicate flesh. Rest the fish briefly afterward to allow juices to redistribute, ensuring a tender, flavorful finish. To achieve the perfect sear, maintaining proper temperature and handling techniques is essential, especially for fragile fish. Proper temperature control helps prevent overcooking and preserves the delicate texture. Additionally, utilizing AI-powered tools can assist in monitoring cooking times and temperatures for optimal results.
Skin and Crust Techniques
When searing proteins with skin or textured surfaces, mastering skin and crust techniques can elevate your results. First, verify the surface is thoroughly dried; moisture prevents proper caramelization. Pat the meat with paper towels and let it sit briefly at room temperature. Preheat your pan to 425-450°F until a water droplet sizzles instantly. Use high smoke point oil, like avocado or refined peanut oil, and heat it until shimmering. For skin-on fish or poultry, score the skin lightly to help render fat and promote crispness. Sear for at least 45 seconds per side, pressing gently to maintain contact. Rotate the meat to sear all edges. A well-executed crust enhances flavor, texture, and presentation—key to professional-quality results. Additionally, paying attention to luggage & bags can ensure you carry all your essential tools safely and efficiently.
Using a Cast-Iron Skillet for Consistent Results

A cast-iron skillet is an excellent choice for achieving consistent, high-quality searing results because of its superior heat retention. Before searing, thoroughly dry your meat to ensure proper caramelization and avoid steaming. Preheat the skillet over medium-high to high heat until it’s scorching hot, confirmed by the water droplet test—water should sizzle and evaporate instantly. Add a thin layer of high smoke point oil, like avocado or grapeseed, and let it shimmer. Place your meat carefully in the skillet, avoiding movement, and sear for at least 45 seconds per side, pressing gently if needed. Use the skillet’s even heat to develop a deep, golden crust. Rotate edges for full coverage, and finish with a brief rest to lock in juices and flavor.
Alternative Searing Methods: Torch and Grill Options

While a cast-iron skillet offers excellent results, alternative searing methods can provide unique advantages depending on your equipment and the dish. Using a torch allows for precise control and quick crust formation, especially on irregular surfaces or delicate items like fish skin. Grilling imparts distinct smoky flavors and a charred crust, ideal for outdoor settings or larger cuts. Both methods require thoroughly dried meat for optimal caramelization. Here’s a comparison:
| Method | Control & Speed | Flavor Impact | Suitable for |
|---|---|---|---|
| Torch | High, precise | Neutral, allows customization | Delicate proteins, small portions |
| Grill | Moderate, even heat | Smoky, charred | Larger cuts, outdoor cooking |
Choose based on your equipment and desired flavor profile for perfect finishing.
Handling Delicate Fish and Poultry for a Perfect Finish

When searing delicate fish and poultry, use gentle techniques to avoid tearing or overcooking the skin. Scoring and rendering skin helps achieve a crisp, even finish without damaging the meat, while precise timing and temperature prevent drying out. Paying close attention to these details guarantees a perfect, restaurant-quality sear every time.
Gentle Searing Techniques
Handling delicate fish and poultry requires a gentle touch during searing to prevent overcooking or tearing the flesh. Use a hot pan, but avoid excessive force. Lightly press fish skin to maintain contact, ensuring even browning without damaging the flesh. Keep searing times short—about 30 seconds to 1 minute per side—focusing on surface crispness. Use a thin layer of high smoke point oil and monitor the temperature carefully. For poultry, score skin lightly before searing to help render fat evenly.
| Technique | Tip |
|---|---|
| Gentle pressing | Lightly press fish skin for consistent contact |
| Short searing time | Limit to 30–60 seconds per side |
| Proper heat | Ensure pan is hot but not smoking excessively |
| Use high smoke point oil | Prevents burning and promotes even sear |
| Minimal flipping | Flip only once to avoid tearing or overcooking |
Scoring and Rendering Skin
Scoring and rendering skin is essential for achieving a crispy, evenly browned finish on delicate fish and poultry. Start by lightly scoring the skin with a sharp knife, making shallow cuts in a crisscross pattern or straight lines, depending on the desired aesthetic. This helps prevent the skin from curling and allows heat to penetrate evenly. For poultry with skin, gently pressing the skin down during searing encourages contact with the hot pan, promoting better rendering of fat. Be careful not to cut too deep, as you don’t want to puncture the flesh. Render the skin by cooking it over high heat until the fat beneath the surface melts and the skin crisps to a golden-brown perfection. Proper scoring and rendering ensure a delectable, crispy exterior without overcooking the delicate interior.
Precise Timing and Temperature
Achieving a perfect finish on delicate fish and poultry requires precise control of timing and temperature during searing, as these proteins are highly sensitive to overcooking. To do this effectively:
- Keep searing times short—around 30 seconds to 1 minute per side—so the surface browns without cooking the interior further.
- Use a hot pan—around 425-450°F (218-232°C)—to quickly form a crust without overexposing the proteins.
- Handle with care—gently press fish skin for uniform contact and flip carefully to avoid breaking delicate flesh.
Monitoring these factors ensures you get a beautifully seared exterior while maintaining tenderness inside. Precision prevents overcooking, preserving the delicate texture of fish and poultry.
Resting and Finishing Touches Post-Searing

After searing, letting your meat rest for a few minutes is crucial to guarantee juices redistribute evenly and maintain moisture. During this time, carry over heat completes cooking, and the crust sets. To enhance presentation and flavor, consider finishing touches like a light sprinkle of finishing salt or a drizzle of herb-infused oil. Proper resting prevents juices from spilling out when sliced, ensuring a juicy bite.
| Step | Purpose | Tip |
|---|---|---|
| Rest 5 minutes | Juices redistribute for even moisture | Cover loosely with foil if needed |
| Add finishing salt | Enhances flavor and crust | Use flaky sea salt for texture |
| Drizzle herb oil | Adds aroma and richness | Apply just before serving |
| Slice against grain | Ensures tender, easy bites | Let meat rest before slicing |
Frequently Asked Questions
How Do I Know When My Pan Is Hot Enough for Searing?
You know your pan is hot enough when a water droplet sizzles and evaporates almost immediately upon contact. Preheat your pan to around 425-450°F, and use the water droplet test to confirm it’s scorching. The surface should be shimmering, and the oil should ripple without smoking excessively. Once these signs appear, your pan’s hot enough for searing, ensuring a perfect crust every time.
Can I Sear Directly From the Refrigerator?
Can you sear directly from the refrigerator? Absolutely, but don’t rush. Think of your meat as a sleeping dragon—cold and sluggish. Take it out, pat it dry thoroughly, and let it sit at room temperature for a few minutes. This way, the surface dries completely, ensuring a hot pan can create that glorious crust. Starting cold can cause steaming, so patience pays off for a perfect sear.
What’s the Best Way to Sear Uneven or Thick Cuts?
To sear uneven or thick cuts, start by ensuring the surface is thoroughly dried to promote proper caramelization. Preheat your pan to a high temperature, around 425-450°F, and use a high smoke point oil. Sear the thickest part first, pressing it down for contact. Rotate and flip the meat frequently, focusing on developing a crust evenly across all surfaces. For very thick cuts, finish in the oven if needed.
How Do I Prevent Sticking or Burning During Searing?
To prevent sticking or burning, start by thoroughly drying your meat to remove moisture, which causes sticking and steaming. Preheat your pan until it’s scorching hot, using the water droplet test to confirm. Use a high smoke point oil, and add just enough to thinly coat the surface. Don’t flip too early—wait until a crust forms—and avoid moving the meat around, which can cause sticking and uneven burning.
Should I Use Butter or Oil for Finishing the Sear?
Use oil for finishing the sear because it has a higher smoke point, preventing burning and sticking. Choose an oil with a high smoke point like grapeseed, canola, or avocado oil. Butter adds flavor and richness but can burn quickly at high temperatures, so it’s best used toward the end of searing or melted with oil. This way, you get a crispy crust without risking burnt flavors.
Conclusion
Mastering the art of searing after sous vide elevates your meat game to restaurant quality. Remember, properly drying your meat boosts searing success, and maintaining the right pan temperature is vital. Did you know that a perfectly seared steak can contain up to 60% more flavor compounds on the surface? By following these tips, you’ll guarantee each bite is juicy, flavorful, and beautifully caramelized every time. Happy cooking!